Welcome
Thank you for using Wittytool DiskClone. Being an integrated solution for crucial data
and powerful OS protection. Focusing on efficient and stable backup, Wittytool DiskClone is dedicated
to safeguarding the operating system, disks, partitions.
Getting Started
This part outlines basic parameters to use Wittytool DiskClone. It is to help you acquire
a general understanding before you get started.
Hardware Requirements
500 MHz processor or faster
A minimum of 1 gigabytes (GB) RAM; A minimum of 2 GB RAM for Windows 8/8.1/10/11
A minimum of 1 GB of available space on the hard disk
Keyboard, mouse and other compatible pointing devices.
System Requirements
- Windows® 7
- Windows® 8
- Windows® 8.1
- Windows® 10
- Windows® 11
Supported File Systems
Wittytool DiskClone supports file systems NTFS. Other files systems are shown to be Other. Wittytool DiskClone supports the
sector-by-sector Clone of Other Partition/Volume.
Supported Hard Disks
Wittytool DiskClone supports disks, including IDE, EIDE, SATA, ESATA, ATA, SCSI,iSCSI, USB 1.1/2.0/3.0 disk and Firewire disks. Wittytool DiskClone supports saving backup images to them without issue. MBR and GPT disks are supported, not supports Dynamic disk.
Home Page
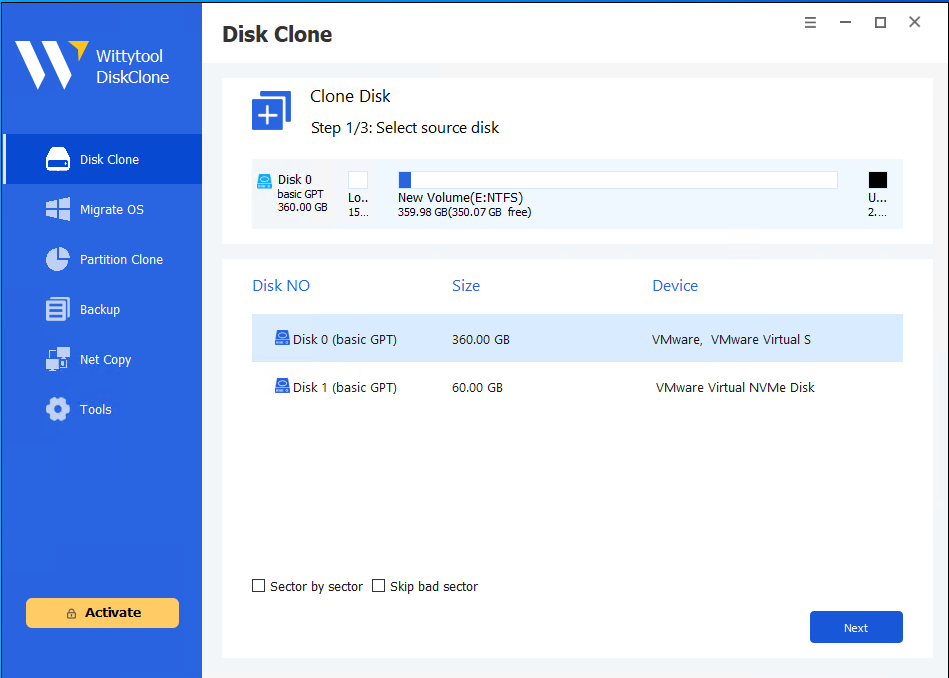
Disk Clone
Clone all the partitions on the source disk.
Select the source disk to clone

Select the disk in the list view. the selected disk’s layout is show on the top of the list view.
Sector by Sector: If the source disk has bad sector or the file system on the disk is damaged. It should be checked to clone all the sectors on the source disk.
Skip bad sector: If the source disk has bad sector. it should be checked. Wittytool DiskClone will ignore the bad sector. Old disks will produce bad sectors. This method can clone all sectors that are not damaged.
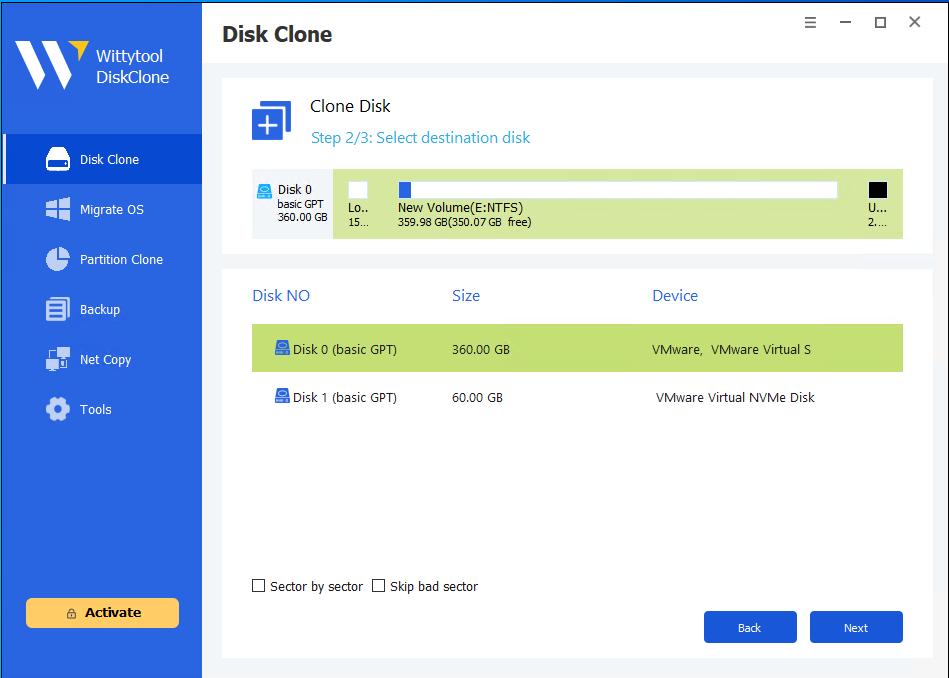
Select the target disk
Confirm the partition size
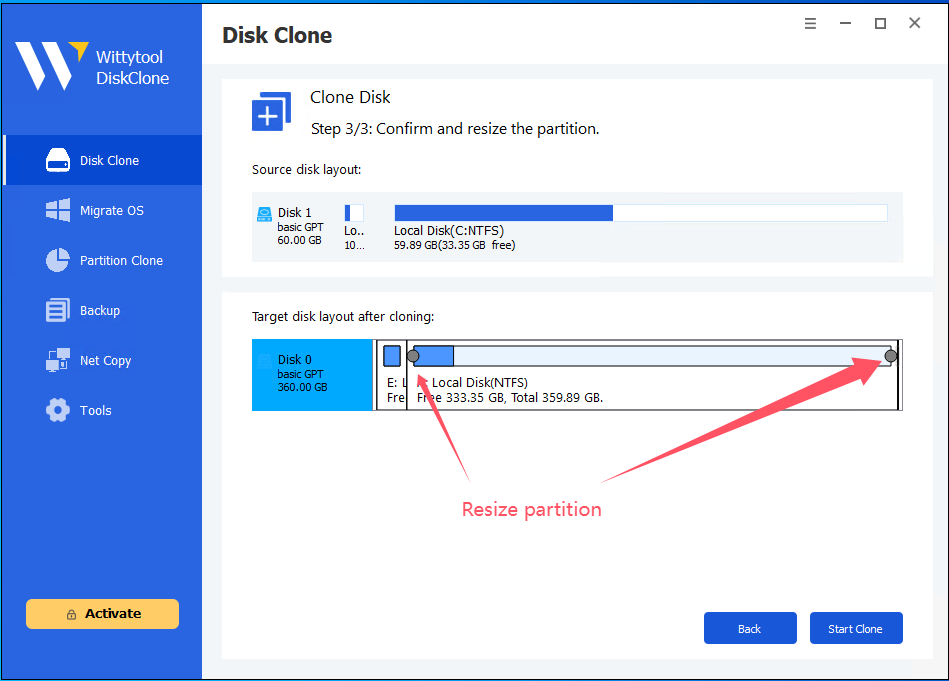
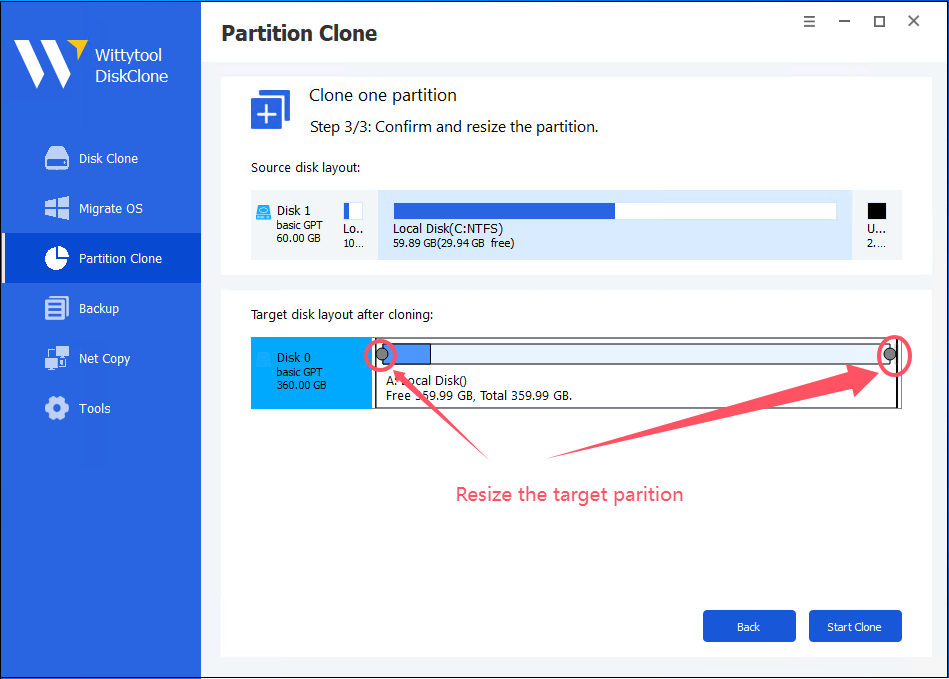
The partition on the target partition can be resized.
Click the “Start Clone” button to begin clone.
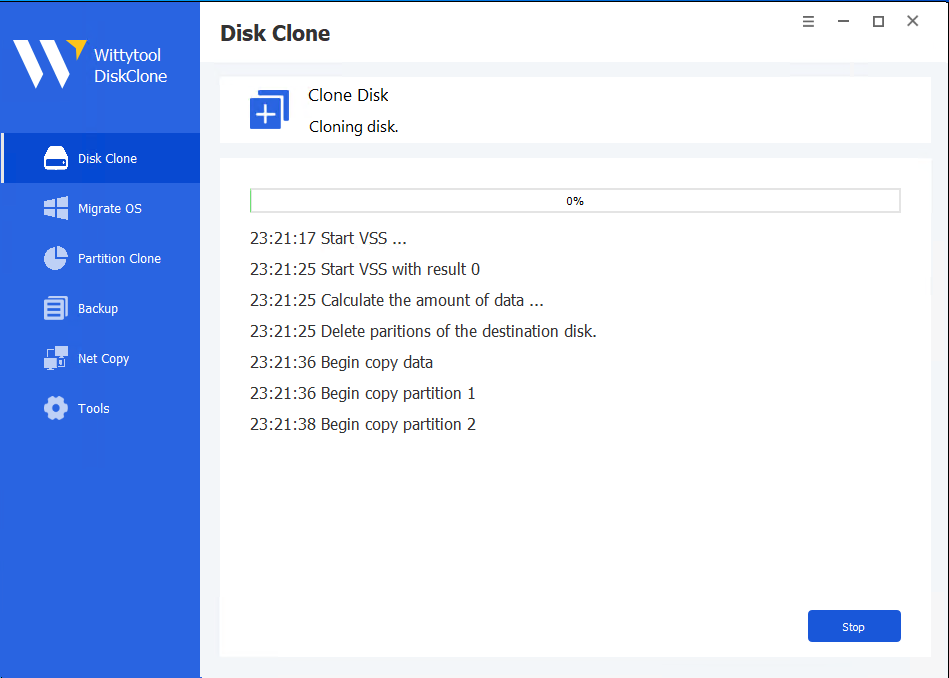
Disk is cloning
Partition Clone
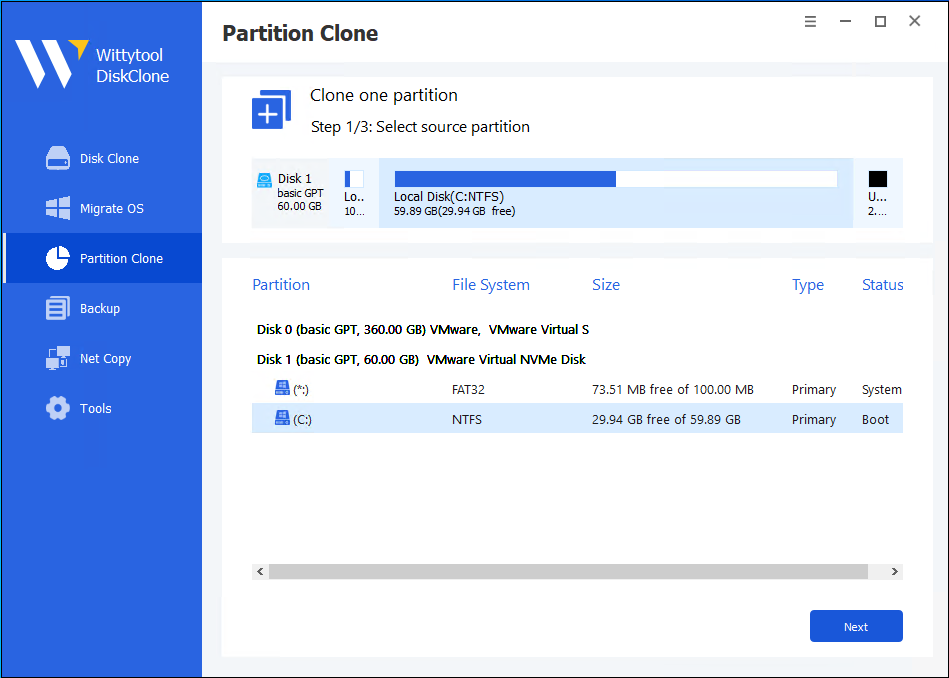
Clone one partition.
Select the source partition
Select the target partition
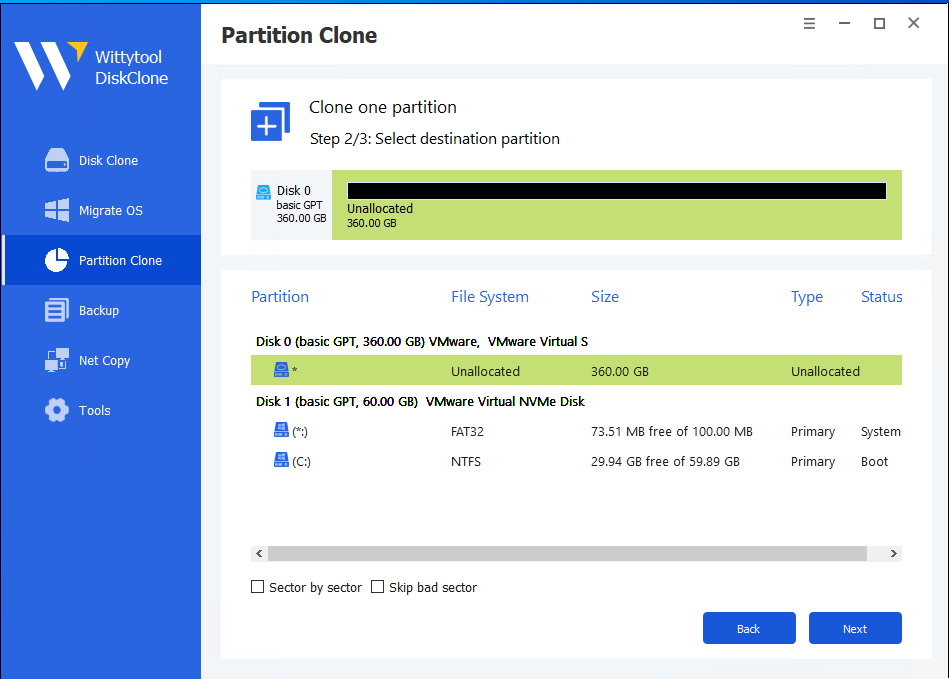
Sector by Sector: Copy all the sectors of the source partition to the target parition. The target partition will keep the size as the source.
Skip bad sector: Skip the bad sectors of the source partition. if the target has bad sector, the cloning will fail.
Confirm and resize the taget partition
Migrate OS
Select the target disk
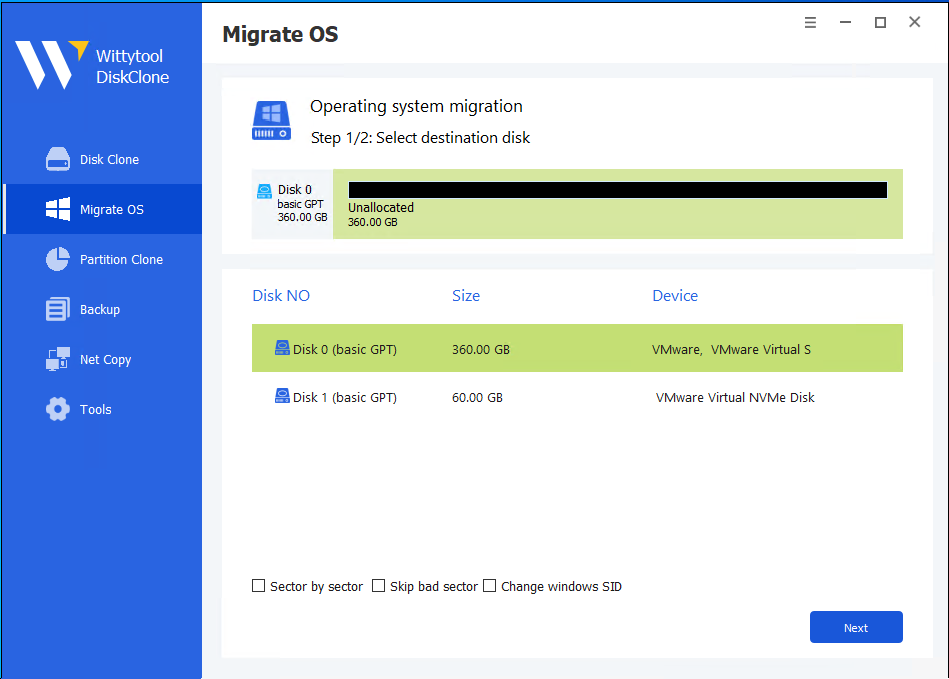
Confirm the patitions’s size
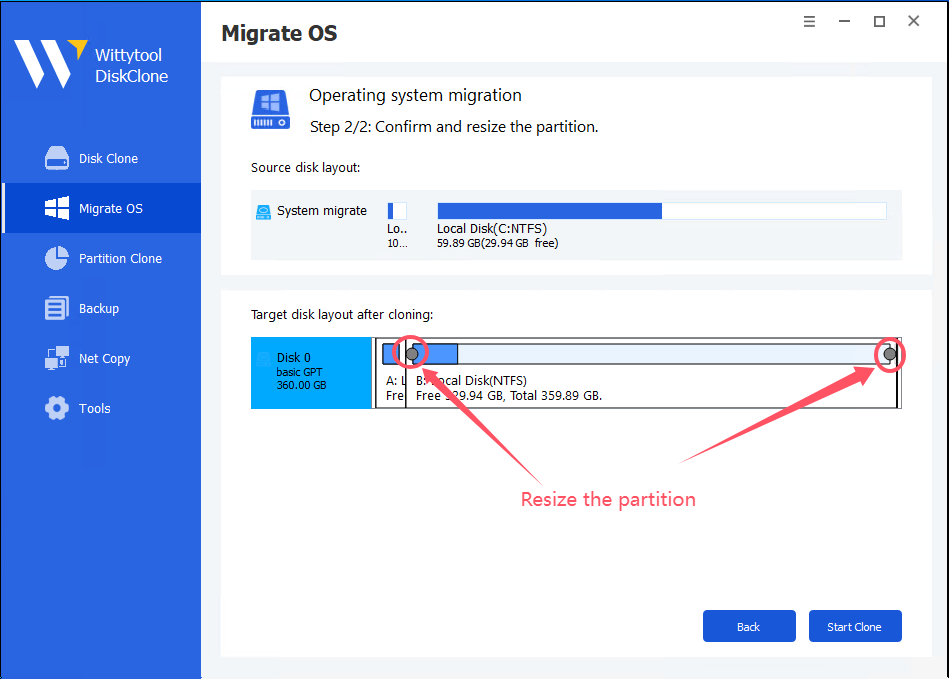
Confirm and resize the partitions on the target disk.
Click the “Start Clone” button to clone.
After cloning is complete, you can set the target disk in the bios as a boot disk. Boot the system on the target disk.
Backup
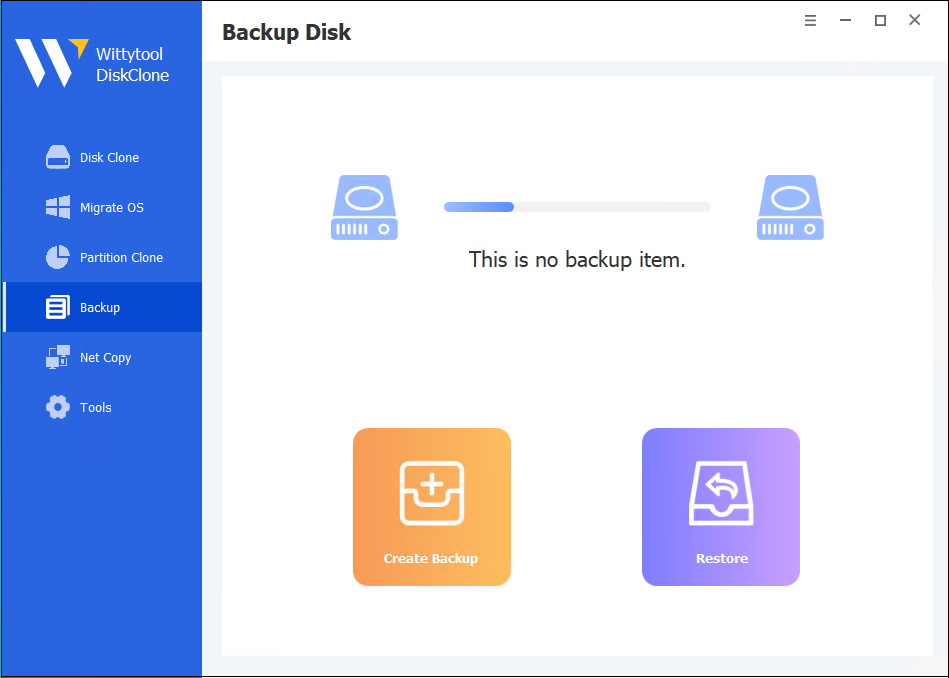
Create the first backup task.
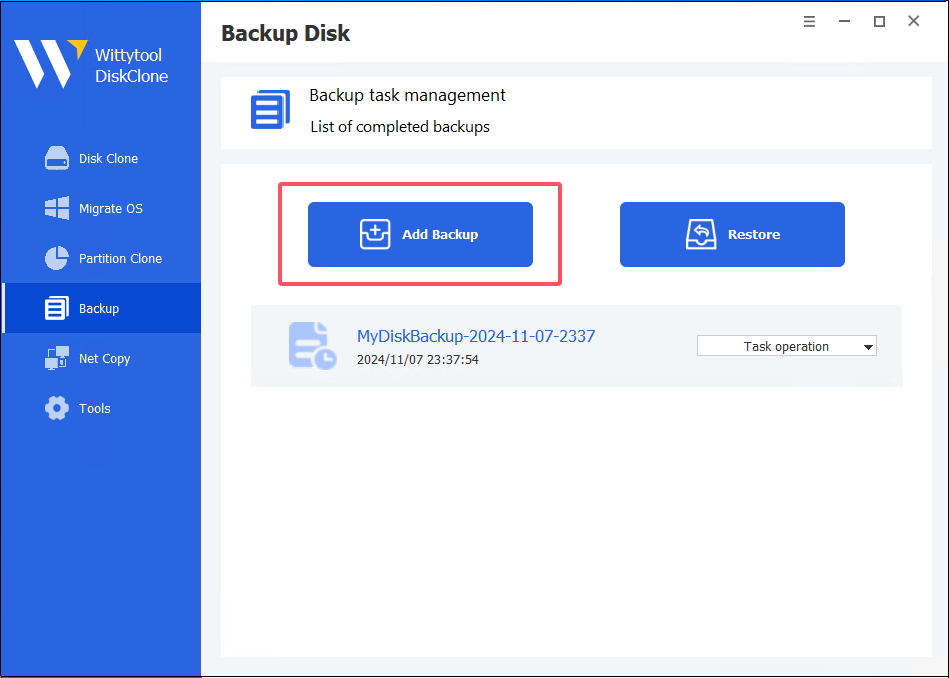
Create more backup task.
Select the patitions to backup
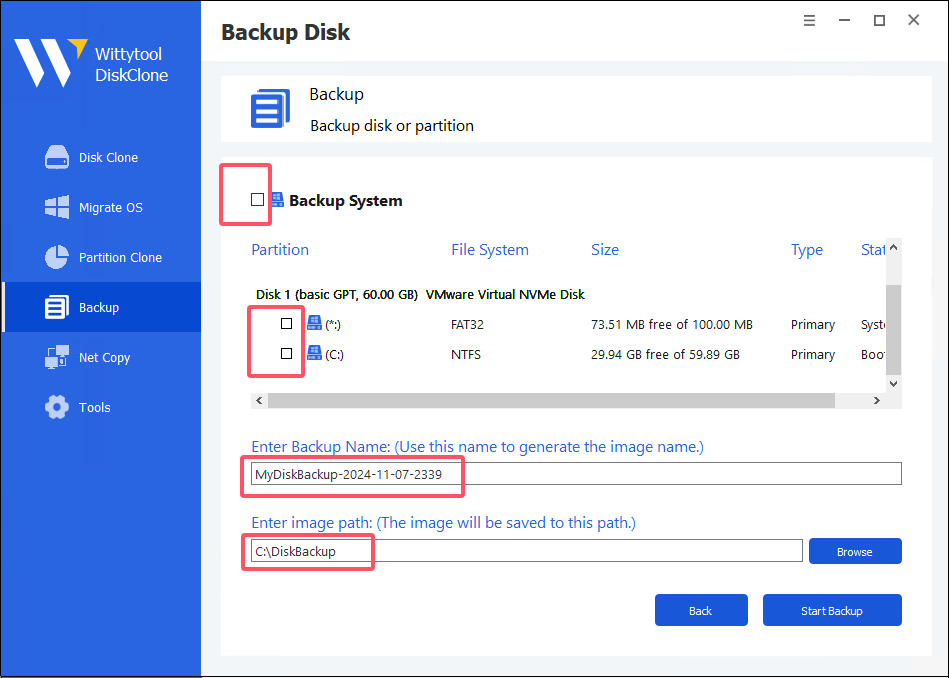
Backup system: Check it to back up all partitions related to the windows system.
Backup Name: Create a backup image file with this name. Some special characters are not allowed.
Doing backup
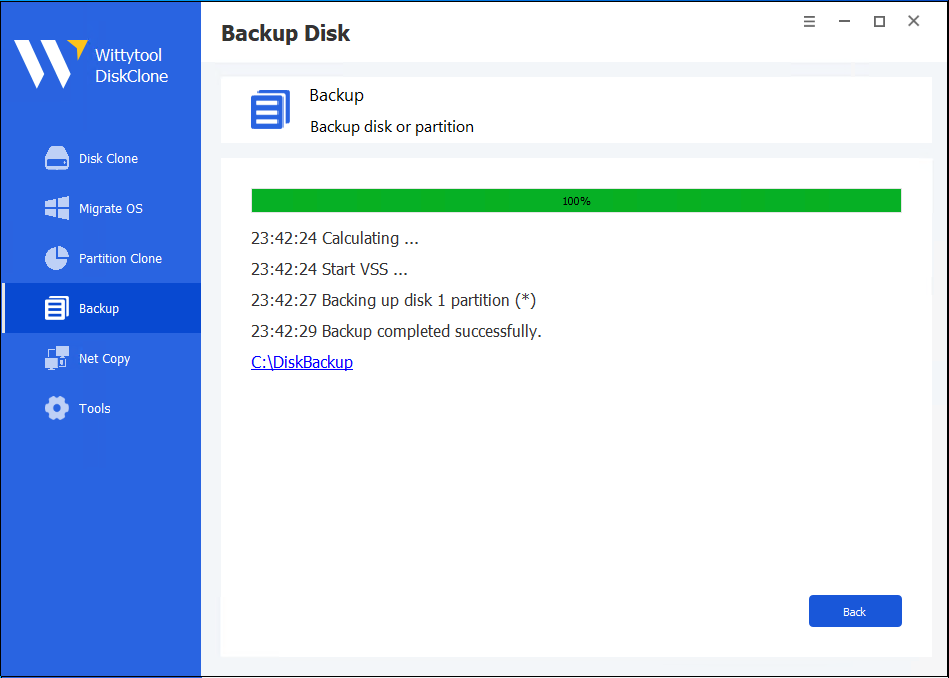
Restore
The partition data can be restored from the image file generated by the backup.
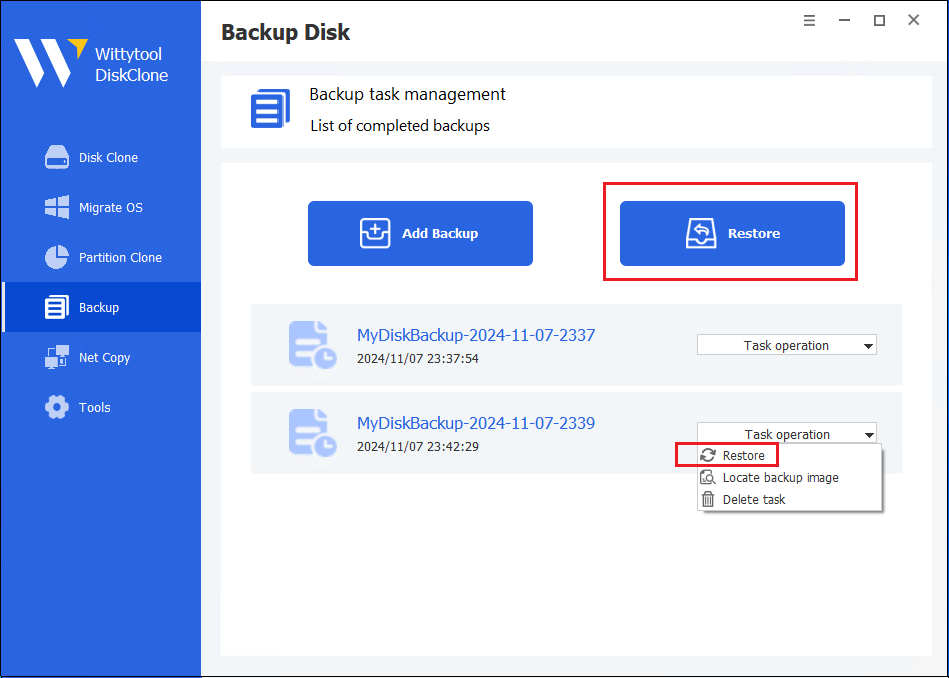
Restore entrance
Restore from the backup task management.
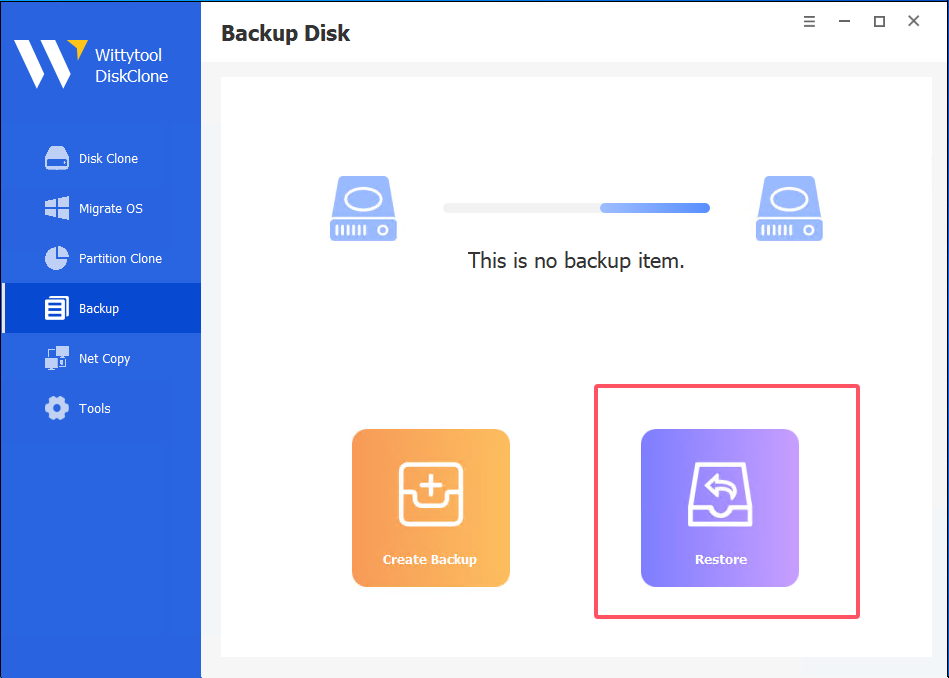
If there is no backup task, enter the restore function from the homepage.
Select the partition in the image file to restore
Select one partition to partition mode.
Select two or more partitions to disk mode.

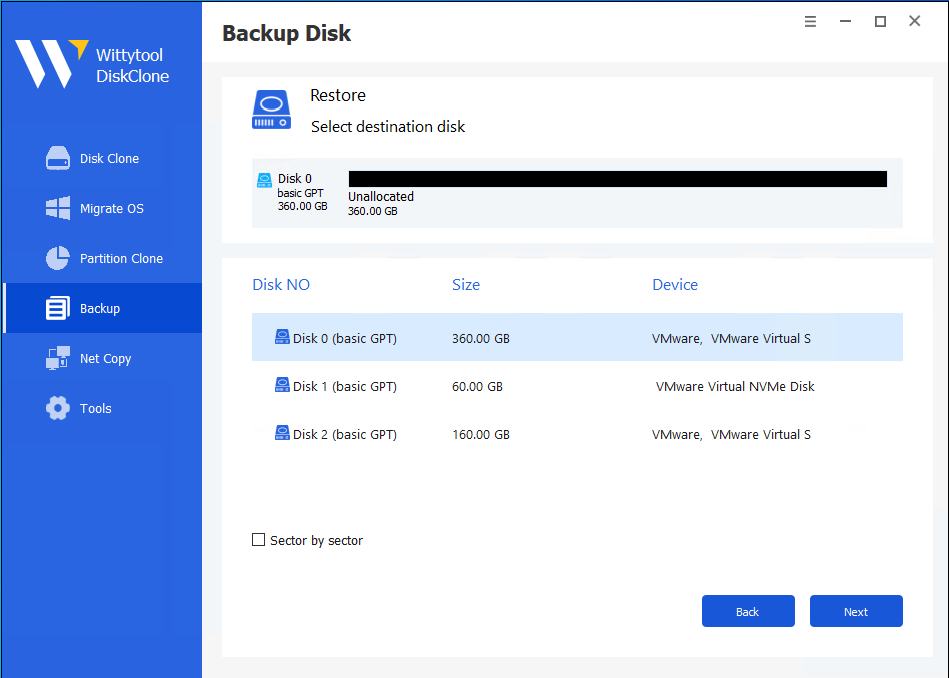
Disk mode: Select the target disk
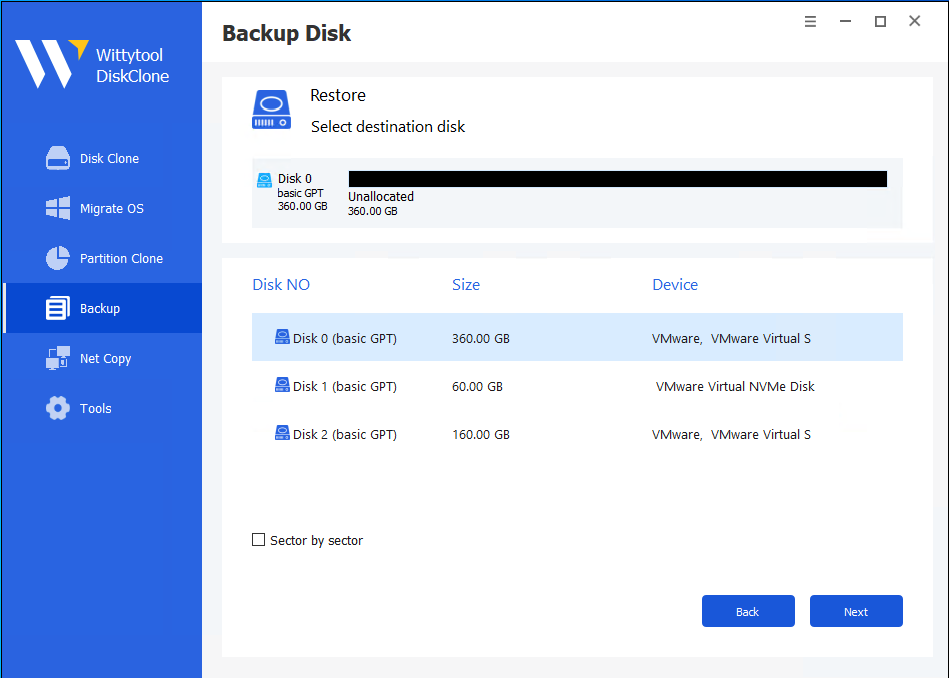
Partition mode: Select the target partition
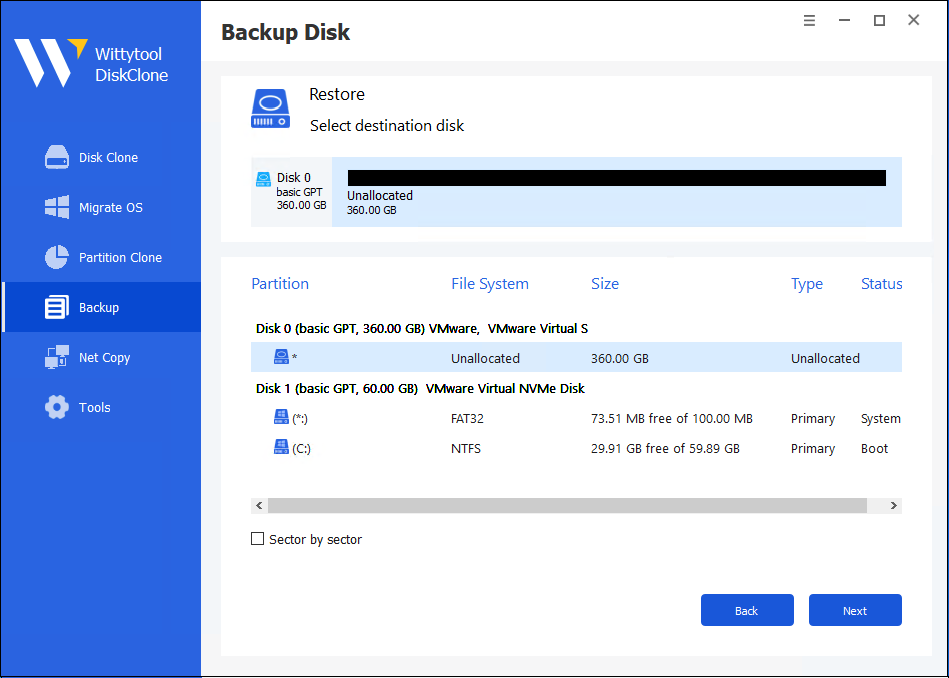
Confirm the target partition, and resize the size.
Click the “Start Restore” to begin restore.
Tools
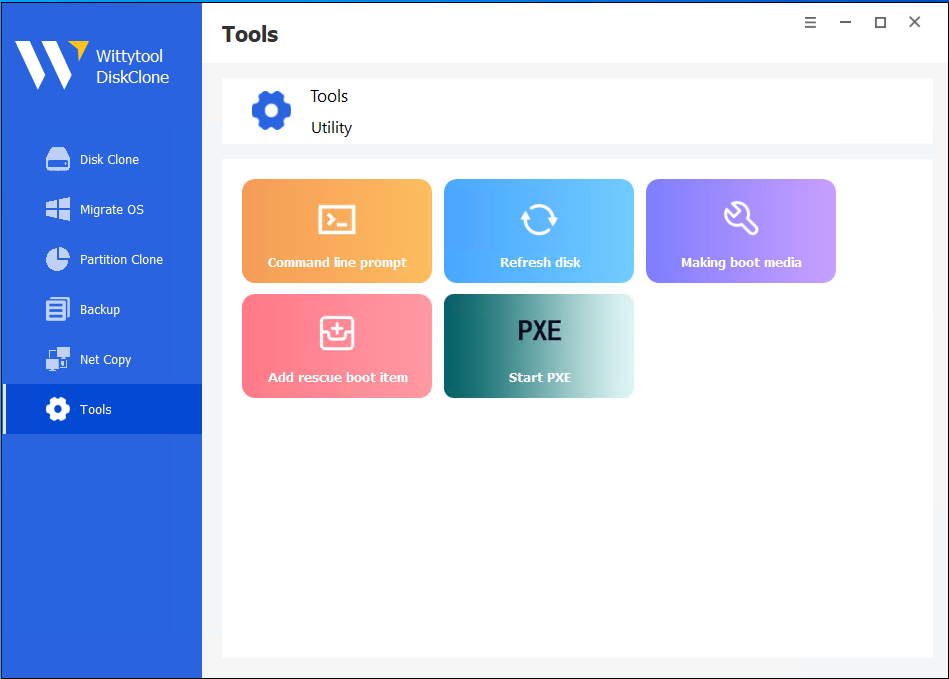
Command line prompt: Run the command line shell.
Refresh disk: When the software is running, the new disk that inserted will not display on the list view. Click “Refresh disk” to load the new disk.
Making rescue disk: Make a bootable USB device, when the windows operation crashed, can use it boot winPE and run Wittytool DiskClone.
Add rescue boot item: Add boot item to the windows boot menu. Reboot the computer and select it, the Wittytool DiskClone will run.
System restore
If the backup image file has system partition, the “Restore OS” check button will show., check it to restore system. The remaining steps are the same as restore.
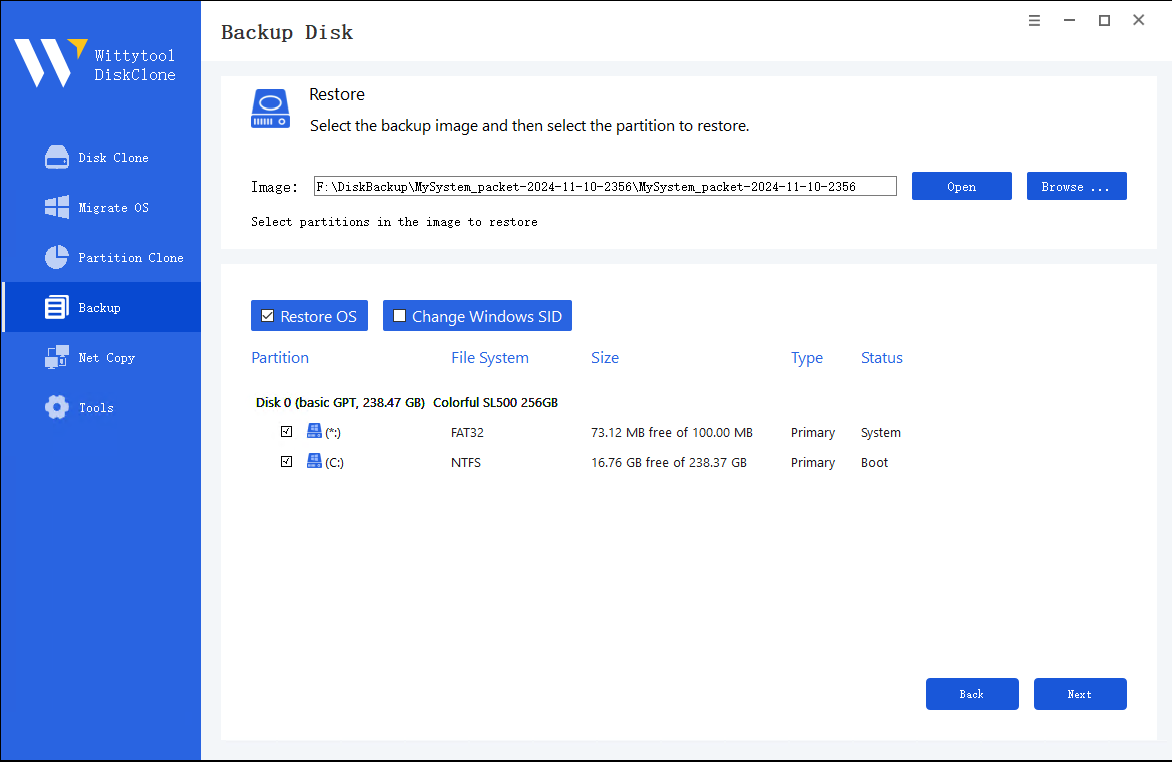
”Change Windows SID”: If the backup image is used to restore multiple computers, please select “Change Windows SID” to avoid data security problems in the local area network.
The “Change Windows SID” won’t be show unless you check the “Restore OS”.

