If your HP laptop is slowing down or running out of storage, it might be time to upgrade your hard drive to a larger HDD or a faster SSD. This guide will walk you through the process of replacing your HP laptop’s hard drive, ensuring a seamless transition without data loss. By using WittyTool DiskClone, you can enhance your laptop’s speed and efficiency without the hassle of reinstalling your operating system or applications.
Preparation Before HP Laptop Hard Drive Replacement
Before you begin the hard drive replacement process, ensure you have the following:
1. A Compatible New HDD/SSD
Select a new hard drive or SSD that is compatible with your HP laptop. Verify the correct model and part number, and ensure the new drive has a larger capacity than the current one. Some compatible drives include:
- HP TAA Version Secure
- HP S700 SSD
- HP G Series XH058UA
- HP Genuine Drives
- HP 160GB 5400rpm Drive
- HP Notebook 1 7GBR000 DRIVE
2. Phillips Screwdriver
A Phillips screwdriver is necessary to open your HP laptop case.
3. Connecting Cable
Most HP laptops have a single hard drive slot. You’ll need a SATA to USB cable or a similar adapter to connect the new drive externally for cloning.
4. Reliable Disk Cloning Software
To avoid reinstalling Windows and your applications, use disk cloning software like WittyTool DiskClone. This tool will replace your hard drive to the new HDD/SSD without data loss, allowing a seamless transition.
Download WittyTool DiskClone to safely transfer your data to the new drive.
How To Replace HP Laptop Hard Drive
Part 1: Connect the New Drive to Your HP Laptop
Begin by connecting the new HDD or SSD to your HP laptop using a SATA to USB cable or an appropriate adapter. This setup allows your laptop to recognize the new drive as an external storage device.
Part 2: Clone Your Existing Hard Drive
WittyTool DiskClone is a versatile and efficient disk cloning tool designed for Windows 11/10/8/7, ideal for upgrading your HP laptop. It facilitates seamless OS migration and data transfer from one sd card to another, ensuring no data loss. By cloning a bootable disk, it saves you significant time by eliminating the need to reinstall Windows and other applications.
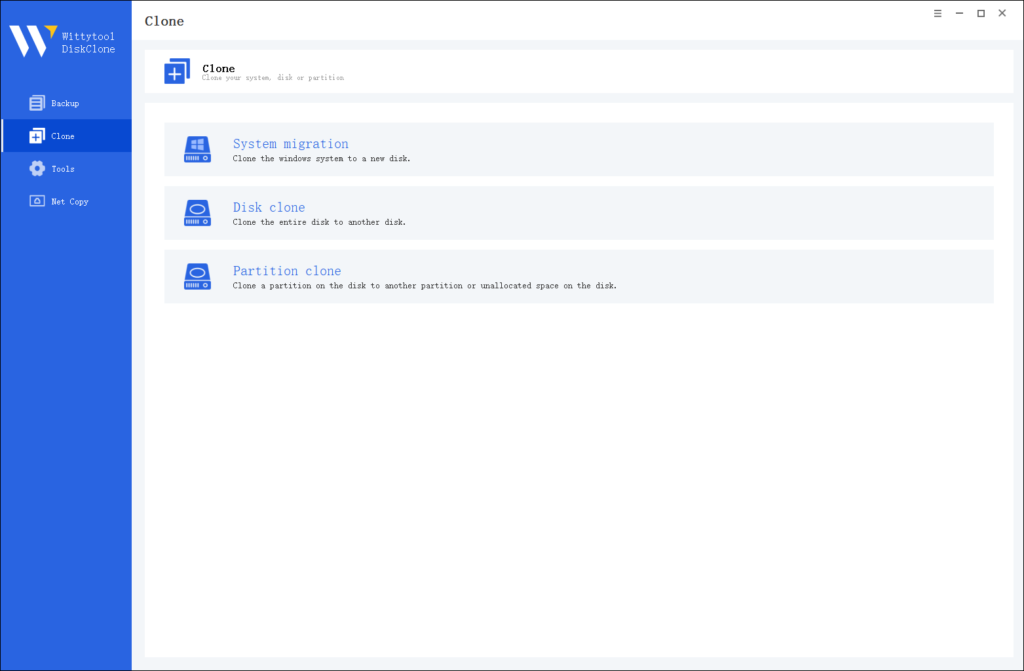
Step 1: Choose Disk Clone Mode
Click on the left panel to access the clone page, then select the disk clone mode.
Note:
During usage, choose the corresponding mode according to your needs. You can read this article about system clone vs system migration to understand the differences in different usage scenarios.
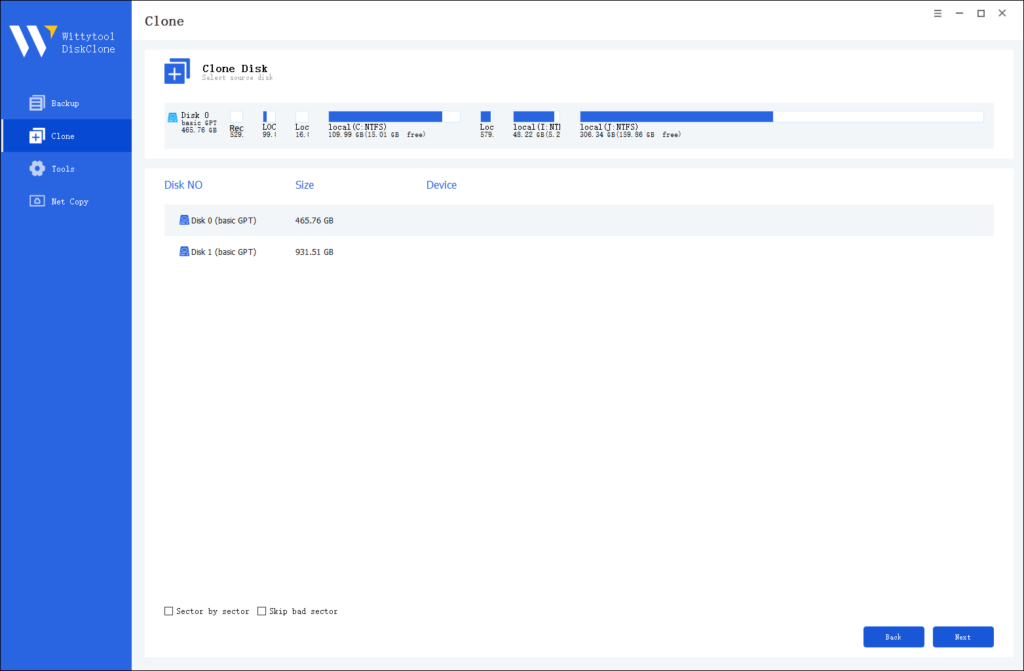
Step 2: Choose Source Disk
Pick the disk from the list view. The layout of the selected disk will be displayed at the top of the list view.
Note:
*Sector by Sector: This option should be selected if the source disk has bad sectors or if the file system on the disk is damaged. It ensures that all sectors on the source disk are cloned.
*Skip Bad Sectors: If the source disk has bad sectors, select this option. Wittytool DiskClone will ignore the bad sectors and clone only the undamaged ones. This method is suitable for older disks that may have bad sectors.
Step 3: Choose Destination Disk
Select the target disk.

Step 4: Resize Partition and Start Cloning
You can resize the partition on the target disk if needed. Click the “Start Clone” button to begin the cloning process.

Part 3: Replace the Old Hard Drive
1. Power Off and Unplug: Shut down your HP laptop and disconnect all external devices and the power cord.
2. Access the Hard Drive Slot: Flip your laptop and remove all screws from the back cover using the Phillips screwdriver.
3. Remove the Old Drive: Locate the hard drive, unscrew it, and carefully remove it from the slot.
4. Install the New HDD/SSD: Insert the cloned HDD/SSD into the slot and secure it with screws. Ensure it’s properly connected to the interface.
5. Reassemble Your Laptop: Replace the back cover and screw it back into place.
Part 4: Restart and Enjoy Enhanced Performance
Turn on your HP laptop. It should boot from the new cloned HDD/SSD seamlessly, offering improved speed and increased storage capacity without the need for any additional setup.
Frequently Asked Questions
1. Can You Replace the Hard Drive in an HP Laptop?
Yes, you can replace the hard drive in an HP laptop by connecting a new HDD/SSD, cloning your existing data using a tool like WittyTool DiskClone, and physically installing the new drive.
2. Is It Worth Replacing the Hard Drive on My Laptop?
Absolutely. Upgrading to a larger HDD or a faster SSD can significantly enhance your laptop’s performance and storage capacity, making it run more smoothly.
3. Can I Replace an HDD with an SSD in an HP Laptop?
Yes. Replacing an HDD with an SSD is highly recommended as SSDs offer faster data access speeds and improved overall performance. Ensure that your laptop has the appropriate slot and that the SSD model is compatible.
Conclusion
Upgrading your HP laptop’s hard drive is a straightforward process that can breathe new life into your device. By following this guide and using reliable tools like WittyTool DiskClone, you can enhance your laptop’s performance and expand its storage without the hassle of reinstalling your operating system or applications. If you encounter any issues during the process, don’t hesitate to reach out to Wittytool Support for assistance.