Upgrading your hard drive or migrating data to a faster SSD? Disk cloning is your golden ticket—but why pay for software when free tools can do the job just as well? In 2025, the landscape of free disk cloning utilities has evolved, offering robust features once reserved for premium tools. Let’s explore the top free disk cloning software this year and how to use them like a pro.
Why Disk Cloning Matters in 2025
Before diving into the tools, let’s address the why. Whether you’re:
- Upgrading to a larger HDD/SSD
- Creating a backup for disaster recovery
- Migrating your OS without reinstalling Windows
…cloning ensures a seamless transition. But with SSD optimization and NVMe support becoming critical, your cloning tool needs to keep up.
What to Look for in Free Cloning Software
Not all free tools are equal. Prioritize these features:
- Speed: NVMe drives demand faster cloning.
- SSD Alignment: Ensures optimal performance post-cloning.
- User-Friendly Interface: No one wants a coding marathon.
- Partition Flexibility: Resize partitions during cloning.
- Bootable Media Support: For system crashes or hardware swaps.
Top 4 Free Disk Cloning Tools for 2025
1.Wittytoo DiskClone Free
WittyTool DiskClone simplifies disk management with precision. Effortlessly recreate recovery partition for system backups or clone entire drives using its intuitive interface. The built-in USB clone tool free ensures seamless data migration between devices, making upgrades and backups faster than ever.
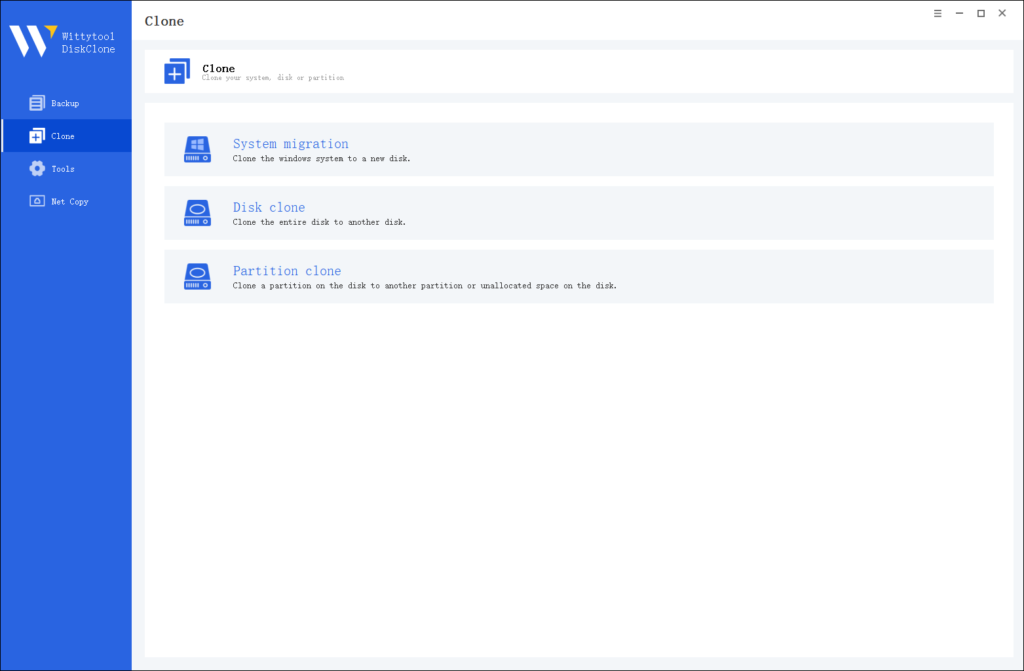
Step 1: Choose Disk Clone Mode
Launch Wittytool Disk Clone and navigate to the main interface. From the left panel, select Disk Clone Mode. This mode is perfect for creating an exact copy of your disk or SD card.

Pro Tip: If you’re specifically looking to transfer data from one SD card to another, check out this detailed guide: how to copy SD card to another.
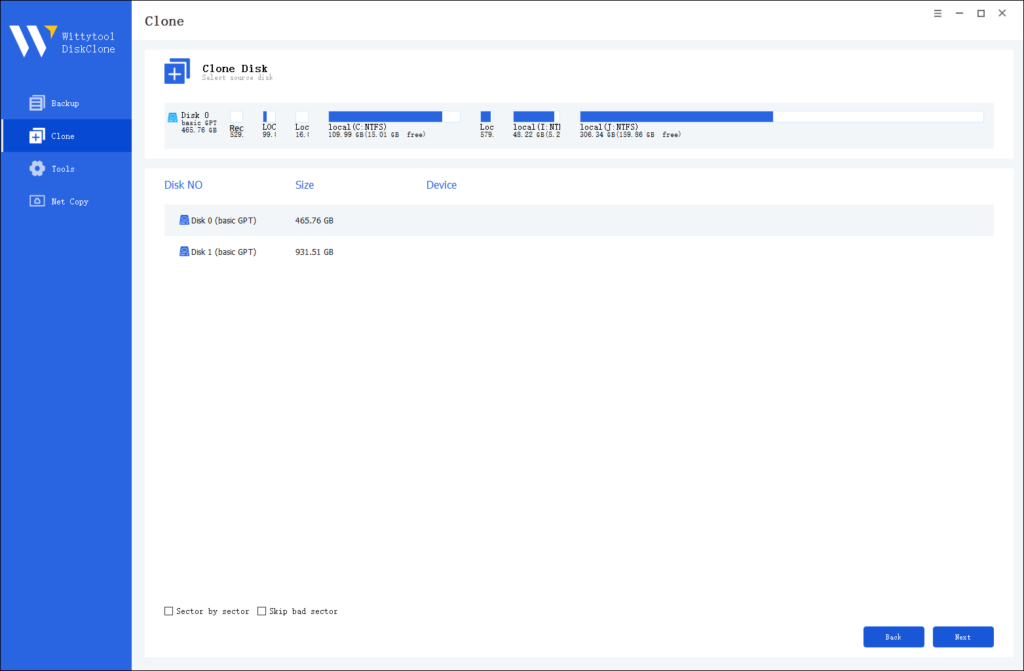
Step 2: Choose Source Disk
Next, select the source disk or SD card you want to clone. The software will display the layout of the selected disk at the top of the list view for easy reference.
Important Notes:
- Sector by Sector Clone: Use this option if your source disk has bad sectors or a damaged file system. It ensures every sector is copied, including damaged ones.
- Skip Bad Sectors: If your source disk has bad sectors, this option allows the software to clone only the healthy sectors, making it ideal for older disks.

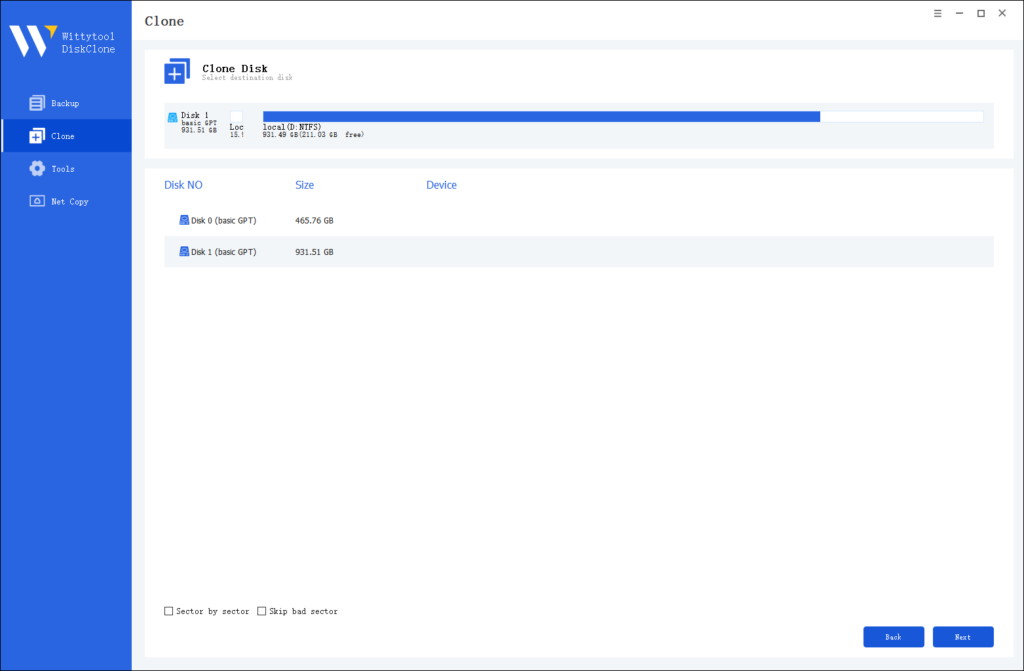
Step 3: Choose Destination Disk
Now, select the destination disk or SD card where the cloned data will be stored. Ensure the target disk has enough storage capacity to accommodate the data from the source disk.

Step 4: Start the Cloning Process
Once you’ve selected the source and destination disks, review the settings and click “Start Clone”. The software will handle the rest, ensuring a seamless and accurate cloning process.

2. Clonezilla Live
Clonezilla Live is a powerful, open-source disk cloning and imaging tool designed for system deployment, backup, and recovery. It supports multiple file systems and operates via a live Linux environment, making it ideal for IT professionals and advanced users seeking a lightweight, cross-platform solution for full-disk or partition-level cloning.
- Best for: Tech-savvy users and system admins.
- Key Features:
- Supports HDD, SSD, and NVMe drives.
- Bare-metal recovery and multicast cloning.
- Open-source and highly customizable.
- Drawback: Steeper learning curve for beginners.
3. Macrium Reflect Free
Macrium Reflect Free is a user-friendly Windows backup and cloning software that enables seamless disk imaging, file backups, and system restoration. Its intuitive interface and incremental backup features cater to home users and small businesses needing reliable data protection without complex configurations.
- Best for: Windows users seeking simplicity.
- Key Features:
- Intuitive drag-and-drop interface.
- Rapid Delta Cloning (copies only changed data).
- Schedule automatic backups.
- Bonus: Integrates with Windows PE for emergency recovery.
4. HDClone Free Edition
HDClone Free Edition offers fast and efficient disk cloning for migrating data between drives, even with aging or damaged hardware. Its sector-by-sector copying method ensures compatibility across diverse storage devices (HDD, SSD, USB), making it a practical choice for upgrading drives or creating bootable backups.
- Best for: Aging hardware or damaged drives.
- Key Features:
- Copy-While-Repair: Skips bad sectors during cloning.
- Ultra-compact 50MB install size.
- Real-time speed adjustments.
- Ideal Use Case: Reviving an old laptop’s HDD.
Step-by-Step: How to Clone Your Drive in 2025
- Backup Data: Always start with a backup (yes, even for cloning!).
- Download Your Tool: Pick from the list above.
- Connect Target Drive: Use a USB-to-SATA adapter for laptops.
- Launch Software: Select “Clone Disk” and follow prompts.
- Verify & Boot: Ensure the cloned drive boots correctly.
Pro Hack: For SSDs, enable TRIM post-cloning to maintain speed.
The Future of Disk Cloning
2025 brings AI-powered cloning tools that predict failures and auto-optimize partitions. While free software covers most needs, consider paid upgrades for:
- Incremental cloning (daily auto-syncs).
- Cross-platform support (Windows to Linux/Mac).
- Enterprise-grade encryption.

