Have you recently replaced your old hard drive with a shiny new SSD, only to find yourself wondering how to install Windows 10/11 after replacing hard drive? You’re not alone! After replacing laptop hard drive without losing data, many of us face this challenge when upgrading our systems. The excitement of improved performance can quickly turn into frustration if the installation process feels daunting.
But don’t worry! In this guide, we’ll break down everything you need to know about how to install Windows after replacing SSD. We’ll ensure you feel confident and equipped for the task. From preparing your installation media to finalizing your setup, we’ll cover it all step-by-step. So, grab your tools, and let’s get your PC up and running with Windows 10/11 on your new hard drive!
Also Read: When Should I Replace My HDD?
Preparing for Installation
Getting ready to install Windows 10/11 after replacing a hard drive involves a few key steps, let’s check if your system meets the requirements for Windows 10/11.
Hardware Compatibility
Ensure your computer’s hardware supports Windows 10/11. Check the processor, RAM, and storage space. Most modern computers should be compatible, but it’s always good to double-check.
Software Prerequisites
Verify that your current software works with Windows 10/11. Some older programs might not be compatible, so look for updates or alternatives. This prevents any software hiccups after installation.
By following these steps, you’ll set yourself up for a successful Windows 10/11 installation. Ready to move on? Let’s get started!
How to Install Windows 10/11 after Replacing Hard Drive
Step 1. Creating Installation Media
Creating installation media with a USB drive. Here’s how you can do it:
1. Get a USB Drive: Ensure the USB drive has at least 8 GB of storage.
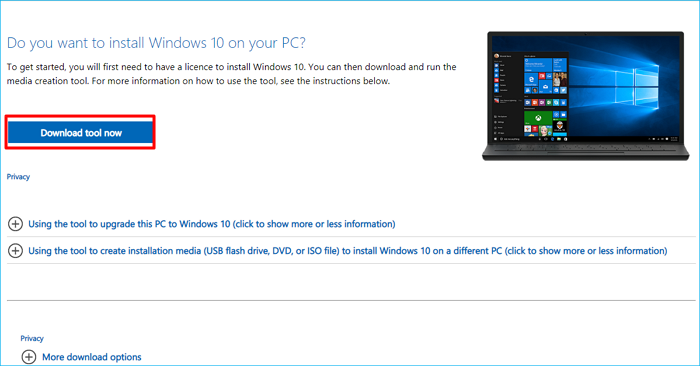
2. Download the Windows Media Creation Tool: Visit the official Microsoft website and download the tool.
- For Windows 10: https://www.microsoft.com/en-us/software-download/windows10
- For Windows 11: https://www.microsoft.com/en-us/software-download/windows11
3. Run the Tool: Open the tool and select “Create installation media for another PC.”
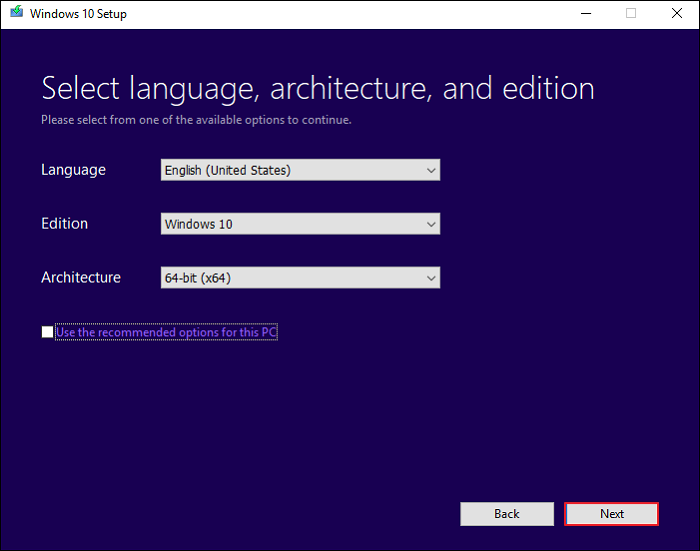
4. Select Preferences: Choose the language, edition, and architecture (32-bit or 64-bit).
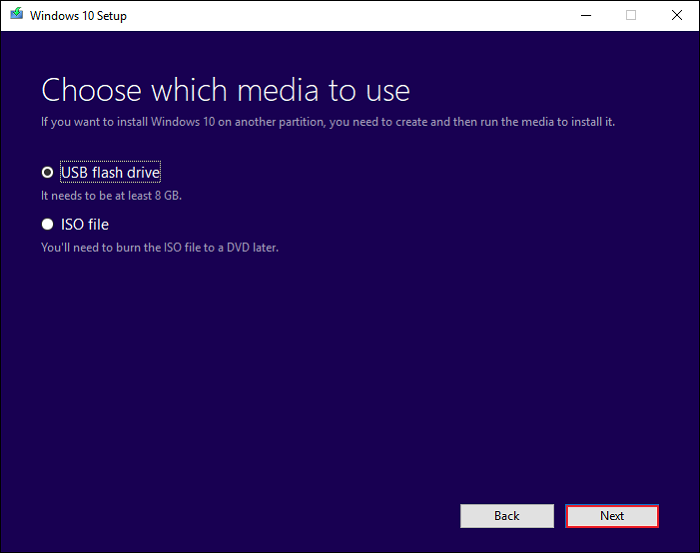
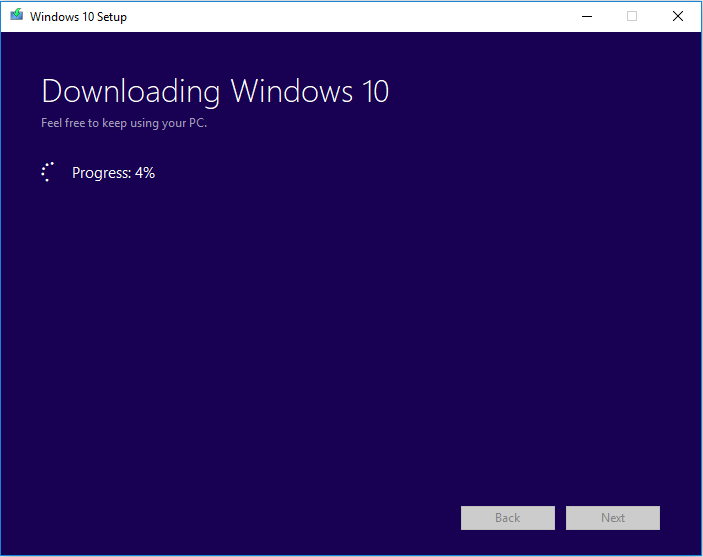
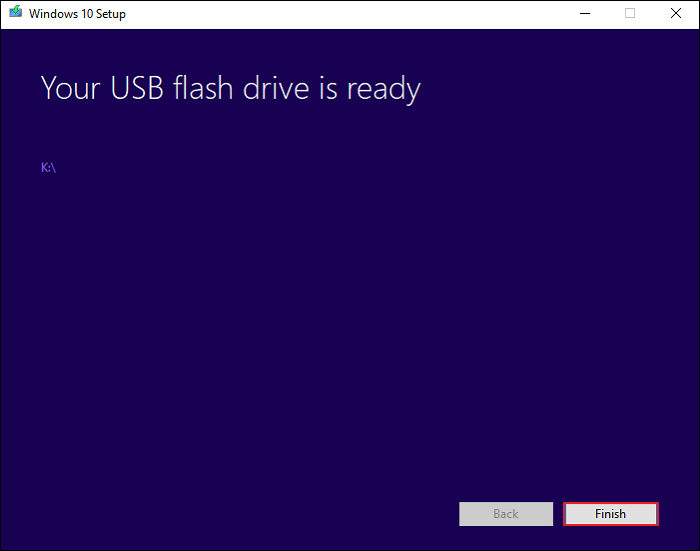
5. Choose USB Drive: Select the USB drive as the destination for the installation files.
6. Wait for Completion: The tool will download and copy the necessary files to the USB drive.
Step 2. Boot from the USB Drive
1. Insert the bootable USB drive into the computer where you want to install Windows.
2. Restart the computer and enter the BIOS or UEFI settings by pressing a specific key (like F2, F10, or DEL) during startup.
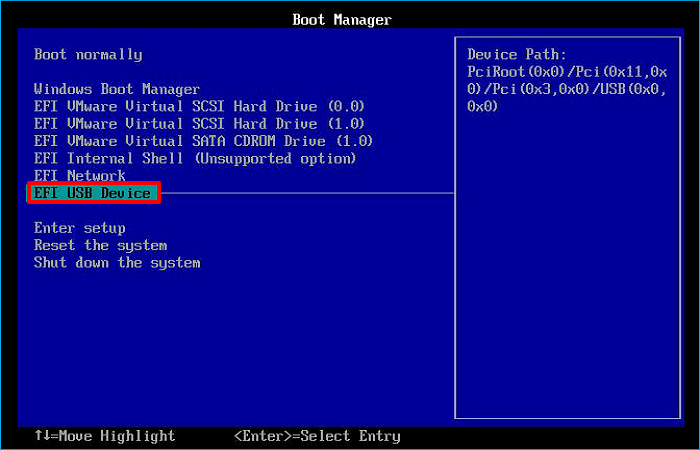
3. Check your computer’s documentation or search online for device-specific instructions.Locate the boot order settings and move the USB drive to the top of the list.
4. Save your settings and exit the BIOS or UEFI. The computer should now boot from the USB drive.
5. Remember, each motherboard has a different BIOS layout, so consult your BIOS or motherboard manual to confirm the location of these settings.
Step 3. Installing Windows 10/11
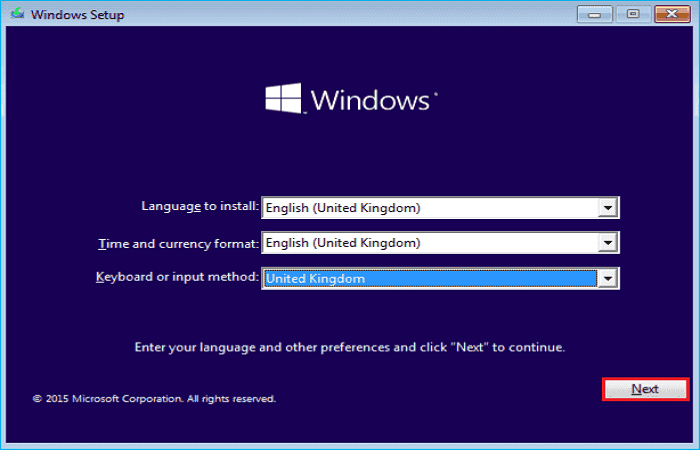
1. On the Windows installation screen, select language, time, currency, and keyboard settings. Click “Next” to proceed with installation.
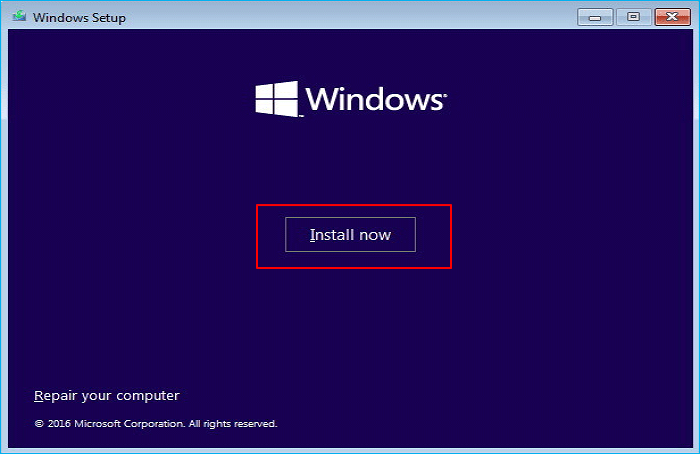
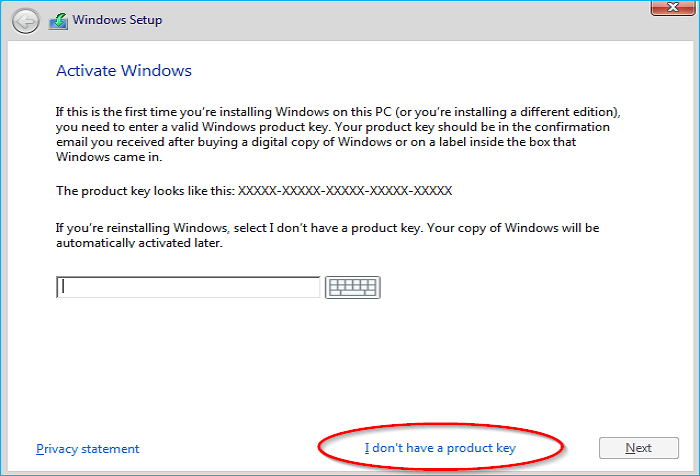
2. Enter your Windows product key if you have one; otherwise, click “I don’t have a product key” to continue. You can activate Windows later.
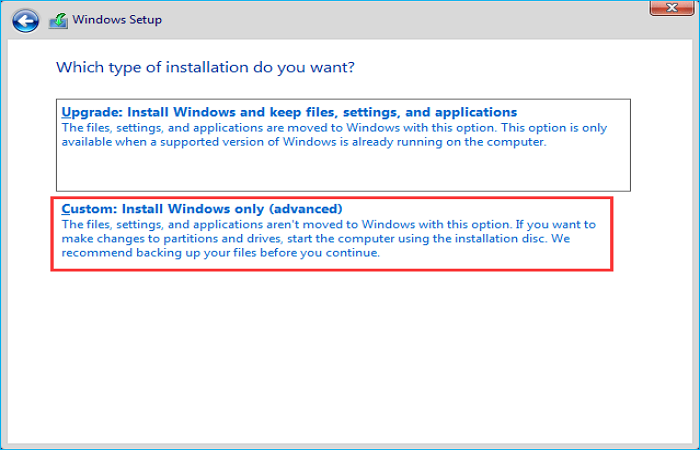
3. Select “Custom: Install Windows only (advanced)” and choose the drive or partition for installation. You can create or format partitions, but formatting will erase data.
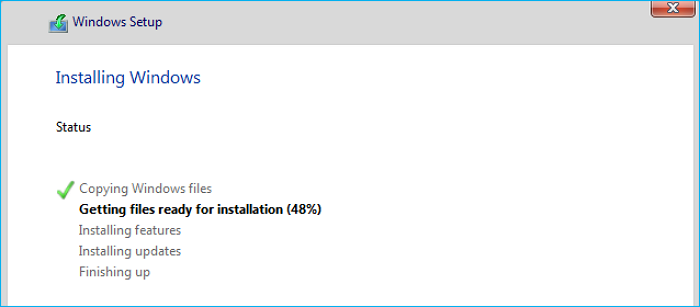
4. Click “Next” to start installation. The computer may restart during the process.
Congratulations! You’ve successfully installed Windows 10 or 11 after replacing your HDD/SSD. Enjoy the enhanced performance and features of your new system.
How to Replace HDD/SSD Without Reinstalling Windows
To use your laptop after replacing the hard drive, you typically need to reinstall the necessary software and Windows, which can be time-consuming. But is there a way to swap a laptop’s hard drive for an SSD without reinstalling Windows? Yes. You can make a clone to transfer your entire system to a new drive without the hassle of reinstallation.
To clone your hard drive, you’ll need professional disk cloning software – Wittytool DiskClone, which is a powerful free disk cloning tool compatible with Windows 11/10/8/7. It enables you to clone your system, disks, or partitions, making it easy to transfer your Windows installation from an HDD to an SSD without data loss. It’s also capable of handling hard drives with bad sectors.
Now download Wittytool DiskClone on your computer, follow these simple steps to transfer data from one sd card to another or transfer data from one SSD to another without losing any information.
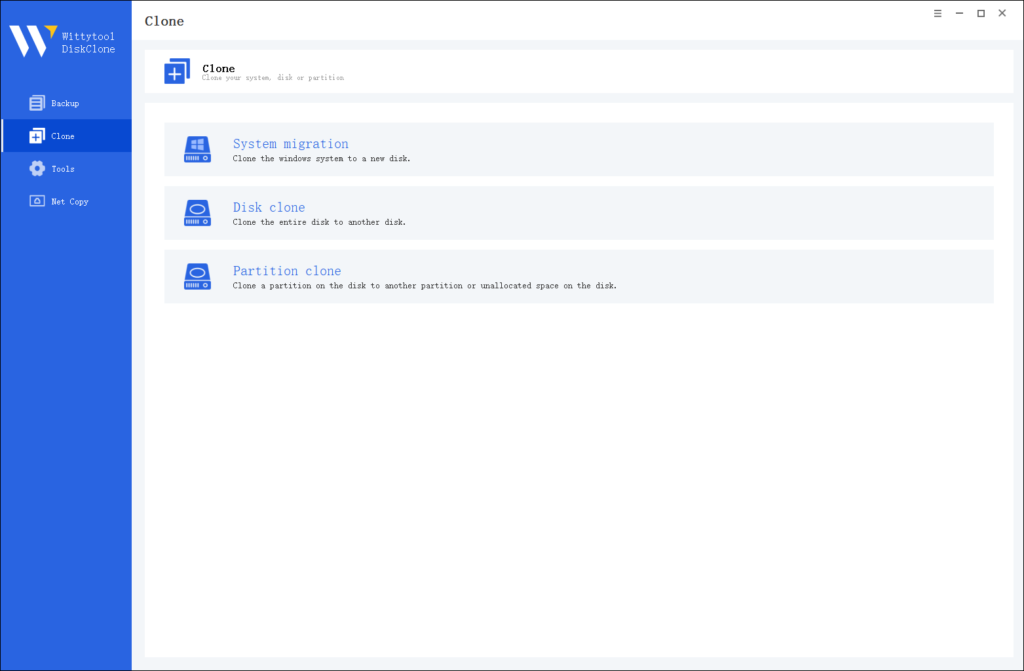
Step 1: Choose Disk Clone Mode
Click on the left panel to access the clone page, then select the disk clone mode.
Note:
During usage, choose the corresponding mode according to your needs. You can read this article about system clone vs system migration to understand the differences in different usage scenarios.
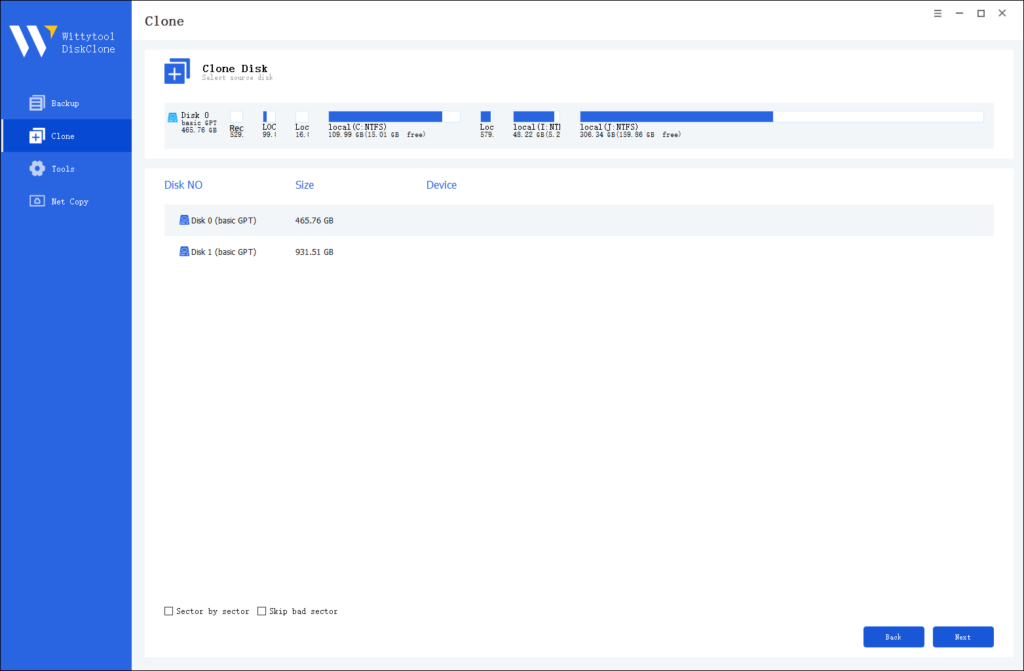
Step 2: Choose Source Disk
Pick the disk from the list view. The layout of the selected disk will be displayed at the top of the list view.
Note:
*Sector by Sector: This option should be selected if the source disk has bad sectors or if the file system on the disk is damaged. It ensures that all sectors on the source disk are cloned.
*Skip Bad Sectors: If the source disk has bad sectors, select this option. Wittytool DiskClone will ignore the bad sectors and clone only the undamaged ones. This method is suitable for older disks that may have bad sectors.
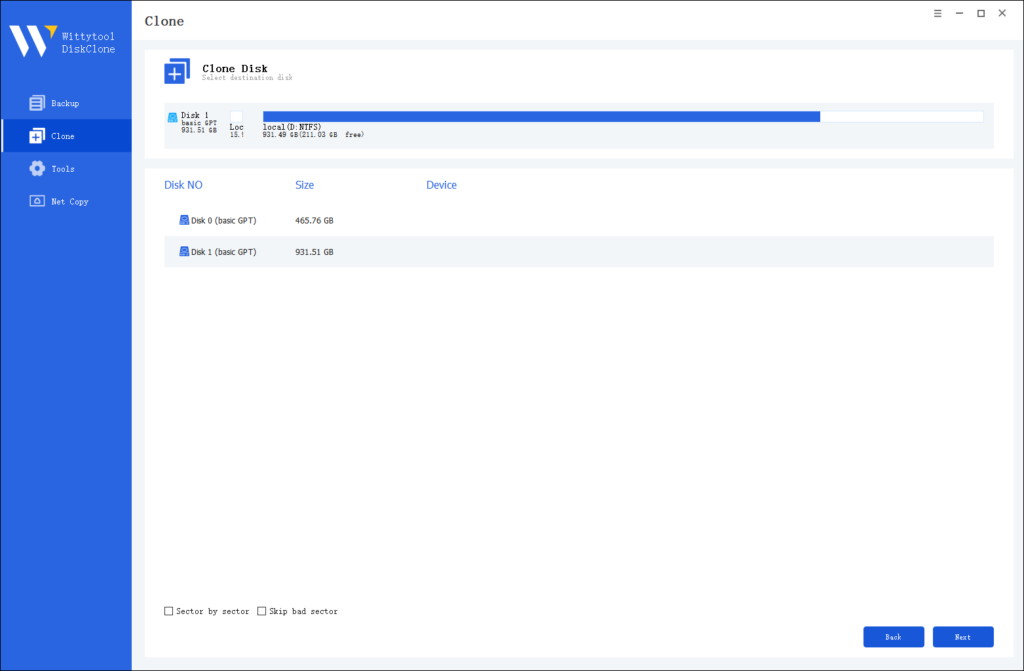
Step 3: Choose Destination Disk
Select the target disk.
Step 4: Resize Partition and Start Cloning
You can resize the partition on the target disk if needed. Click the “Start Clone” button to begin the cloning process.

Remember, WittyTool DiskClone can help prevent data loss during transitions. Fast, reliable, and secure cloning ensures smooth upgrades. Keep exploring and enjoy your new setup!
Conclusion
You’ve now learned how to install Windows 10/11 after replacing a hard drive. Upgrading to Windows 10/11 enhances security and performance. Consider using WittyTool DiskClone for a seamless transition. This tool offers fast, reliable, and secure disk cloning. Don’t hesitate to seek help if you encounter issues. Check out the FAQs below for common questions.
- What if I lose data during installation? Use WittyTool DiskClone to back up data.
- Can I upgrade from Windows 7 directly? Yes, but ensure hardware compatibility.
- Is a product key necessary? Yes, for activation.

