Is Your PC Slow? Here’s How to Turbocharge It by Moving Windows 10 to an SSD
Upgrading from an HDD to an SSD can feel like giving your computer a caffeine shot—suddenly, everything runs faster! But the idea of transferring your OS might seem daunting. Don’t worry—this guide simplifies the process, ensuring no data loss and zero headaches. Let’s dive in!
Why Upgrade to an SSD?
Before we get technical, let’s talk benefits. Replace your HDD for an SSD:
- Faster boot times (think seconds, not minutes!)
- Silent operation (no more whirring disks).
- Improved durability (no moving parts = less risk of damage)
- Energy efficiency (perfect for laptops)
What You’ll Need
- A compatible SSD (ensure it has enough space for your OS and files).
- A SATA-to-USB cable or enclosure (to connect the SSD if you’re using a laptop).
- Cloning software (we recommend Wittytool DiskClone for its simplicity and reliability)
Step-by-Step Guide to Cloning Your HDD to SSD
Follow these steps to migrate Windows 10 seamlessly:
⚙️ Phase 1: Prepare Your SSD
- Back up your data: While cloning is safe, backups are a safety net.
- Connect the SSD: Use a SATA cable for desktops or a USB adapter for laptops.
- Check partition styles: Ensure your HDD and SSD use the same format (MBR or GPT) to avoid boot issues.
⚙️ Phase 2: Launch Wittytool DiskClone (a reliable clone and backup software)
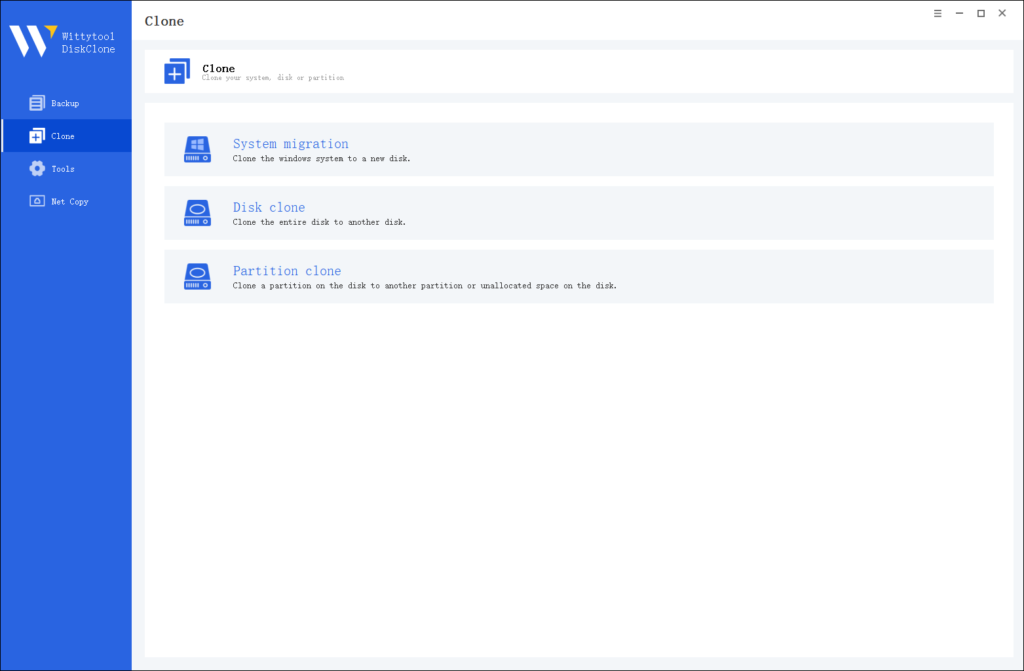
Step 1: Choose Disk Clone Mode
Launch Wittytool Disk Clone and navigate to the main interface. From the left panel, select Disk Clone Mode. This mode is perfect for creating an exact copy of your disk or SD card.
Pro Tip: If you’re specifically looking to transfer data from one SD card to another, check out this detailed guide: how to copy SD card to another.
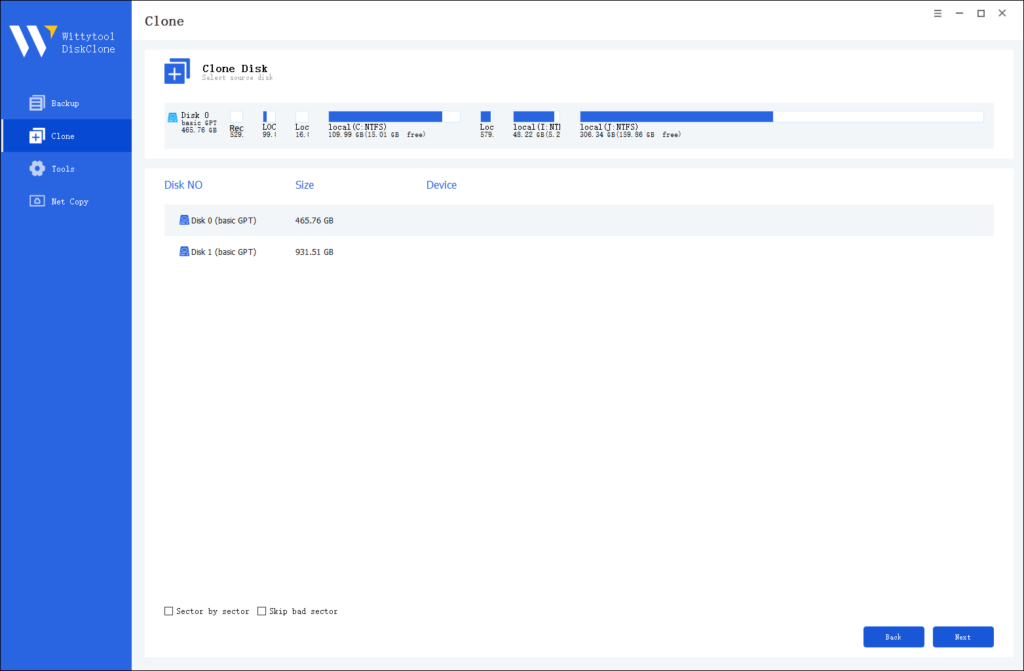
Step 2: Choose Source Disk
Next, select the source disk or SD card you want to clone. The software will display the layout of the selected disk at the top of the list view for easy reference.
Important Notes:
- Sector by Sector Clone: Use this option if your source disk has bad sectors or a damaged file system. It ensures every sector is copied, including damaged ones.
- Skip Bad Sectors: If your source disk has bad sectors, this option allows the software to clone only the healthy sectors, making it ideal for older disks.
Step 3: Choose Destination Disk
Now, select the destination disk or SD card where the cloned data will be stored. Ensure the target disk has enough storage capacity to accommodate the data from the source disk.

Step 4: Start the Cloning Process
Once you’ve selected the source and destination disks, review the settings and click “Start Clone”. The software will handle the rest, ensuring a seamless and accurate cloning process.

⚙️ Phase 3: Optimize for SSD Performance
- Tick “Check the option if the target is SSD” to enable 4K alignment, boosting speed and lifespan.
- Adjust partitions if needed (e.g., resize to fit the SSD’s capacity)
⚙️ Phase 4: Start the Cloning Process
- Click Proceed and wait for the software to copy your data.
- Time estimate: 10–30 minutes for ~100GB of data.
⚙️ Phase 5: Swap the Drives
- Shut down your PC and replace the HDD with the cloned SSD.
- Enter BIOS (F2/F12/DEL during startup) and set the SSD as the primary boot drive.
Post-Cloning Checklist
- Test the SSD: Boot your PC – if it starts smoothly, you’re golden!
- Wipe the old HDD: Use it as extra storage after confirming the SSD works.
- Optimize your SSD: Enable TRIM (already on by default in Windows 10) for long-term performance.
FAQs: Your Burning Questions, Answered
- Can I clone only Windows, not my entire HDD?
Yes! Use System Clone mode in Wittytool to transfer just the OS. - What if my SSD is smaller than my HDD?
Ensure the SSD has enough space for used data (not total capacity). Use tools to delete unnecessary files first. - Why won’t my cloned SSD boot?
Check BIOS settings (UEFI vs. Legacy) and ensure the SSD is properly connected
Final Tip: Keep It Simple
Cloning might sound technical, but tools like Wittytool DiskClone make it beginner-friendly. Whether you’re a gamer craving faster load times or a professional needing reliability, an SSD upgrade is worth every penny.
Ready to say goodbye to sluggish performance? Grab your SSD and start cloning today!