Upgrading to an SSD (Solid State Drive) is one of the most effective ways to revitalize an aging PC. But simply cloning your entire hard drive isn’t always the best approach—especially if you want to avoid unnecessary data transfer or compatibility issues. This guide explains how to migrate OS to SSD efficiently while preserving your files, settings, and applications. We’ll also clarify the difference between system migration vs clone disk:
- System migration transfers only the OS and critical files, ideal for optimizing storage and avoiding clutter.
- Clone disk duplicates the entire drive, including unused space, which may not suit smaller SSDs.
Proceed to Transfer System to SSD in Windows
- Choose a compatible SSD: Ensure the SSD’s capacity exceeds your current OS partition size. Popular options include NVMe SSDs for speed or SATA SSDs for budget-friendly upgrades.
- Back up data: Use built-in tools like Windows Backup or third-party software to safeguard your files.
- Initialize the SSD: Connect the SSD via SATA/USB or install it internally. Initialize it in Disk Management (GPT for UEFI, MBR for BIOS).
How to Migrate OS to SSD
WittyTool DiskClone is a powerful yet user-friendly disk cloning and backup software designed to simplify the process of transferring Windows 10 to SSD while ensuring data integrity and system optimization. Whether you’re upgrading your laptop’s storage or enhancing your desktop’s performance, this tool offers a hassle-free solution for users of all skill levels.
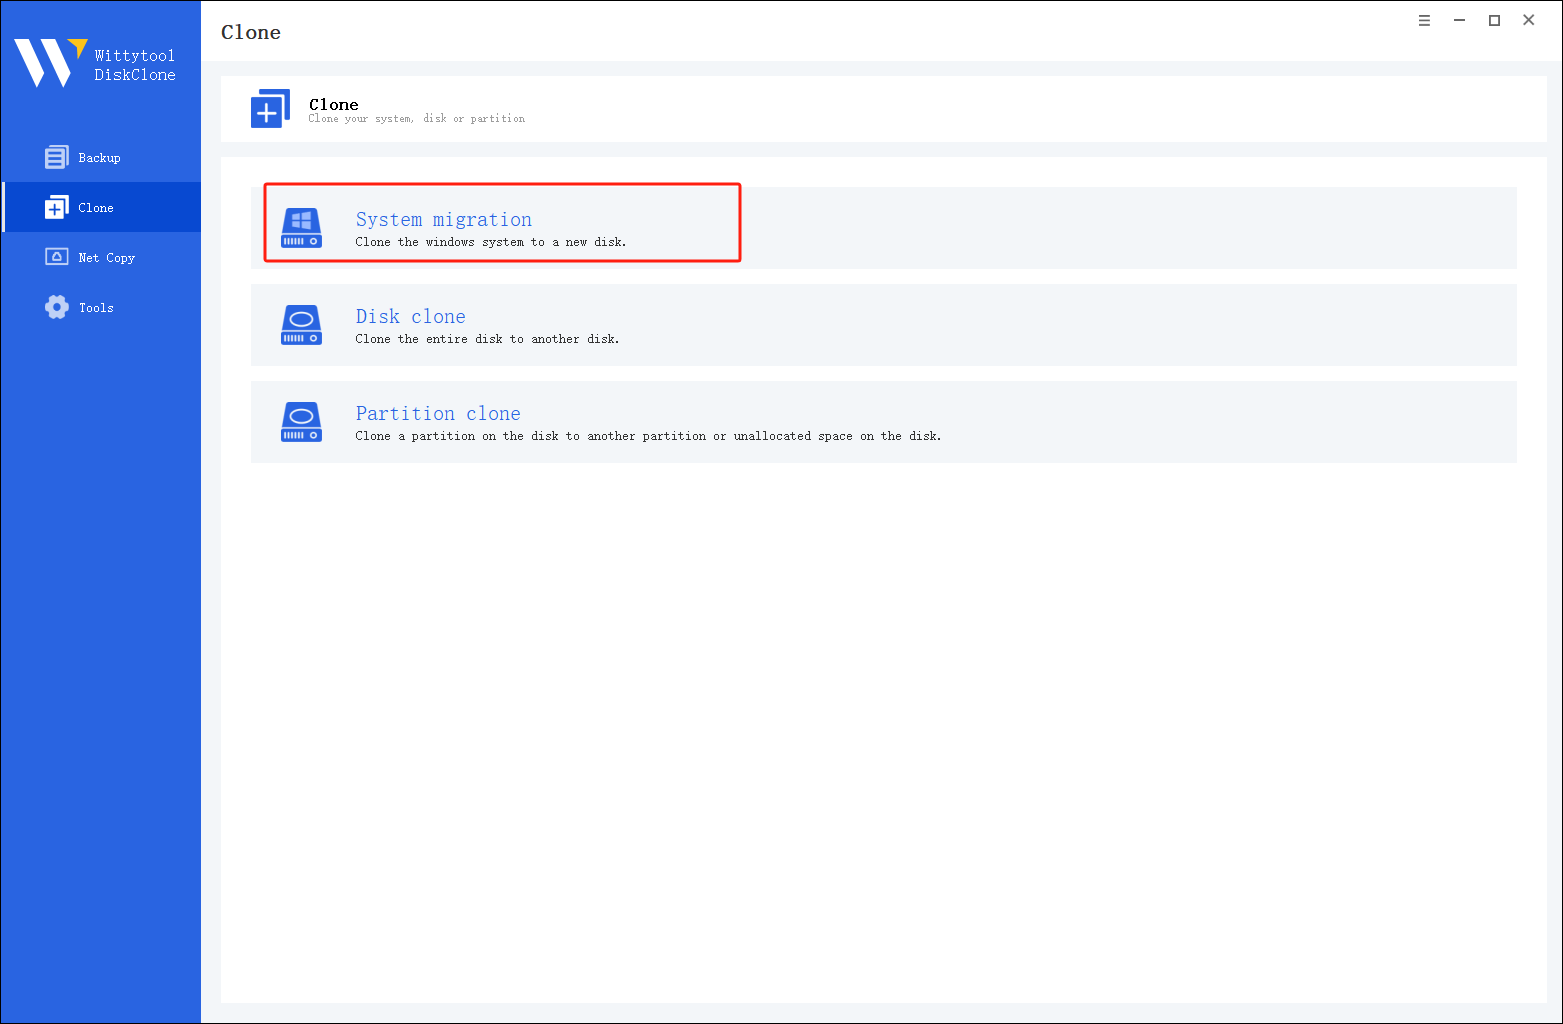
Step 1: Select System Migration Mode
Access the clone page by clicking the left panel, then choose the System migration mode.
Step 2: Select Destination Disk
Choose the destination disk from the list. The layout of the selected disk will appear at the top of the list.
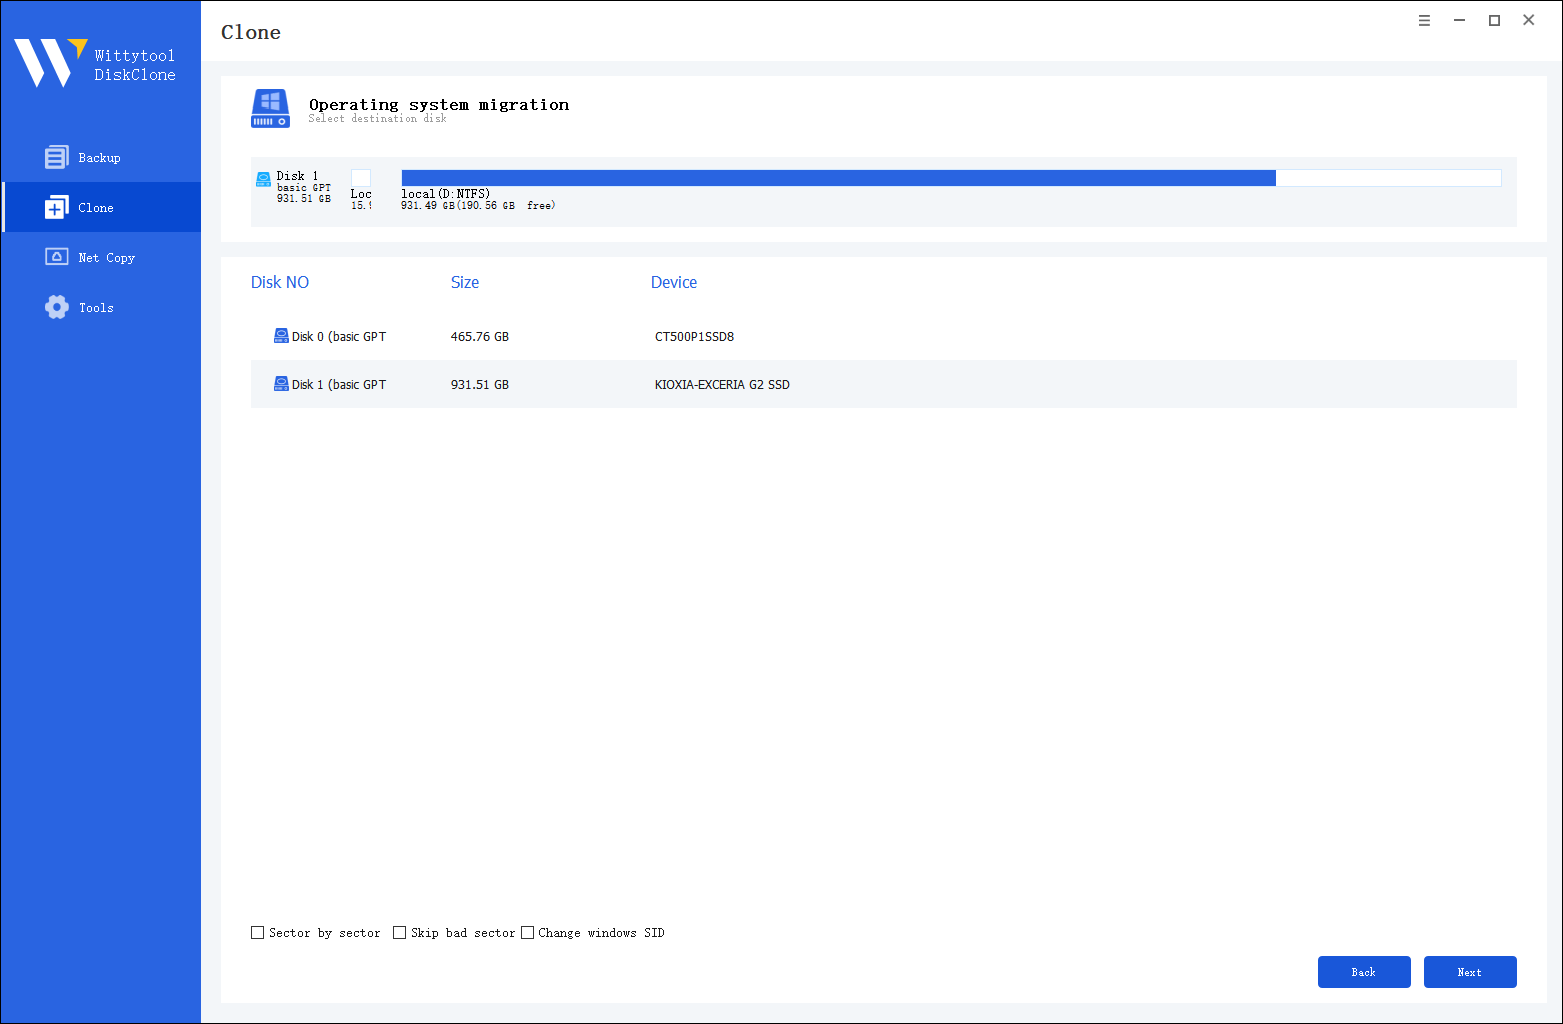
Note:
*Sector by Sector: Select this option if the source disk has bad sectors or a damaged file system. This ensures all sectors of the source disk are cloned.
*Skip Bad Sectors: If the source disk contains bad sectors, choose this option. Wittytool DiskClone will bypass the damaged sectors and clone only the intact ones, making it ideal for older disks with bad sectors.
*Change Windows SID: When cloning multiple machines on the same network, select “Change Windows SID” to prevent security issues related to network access.
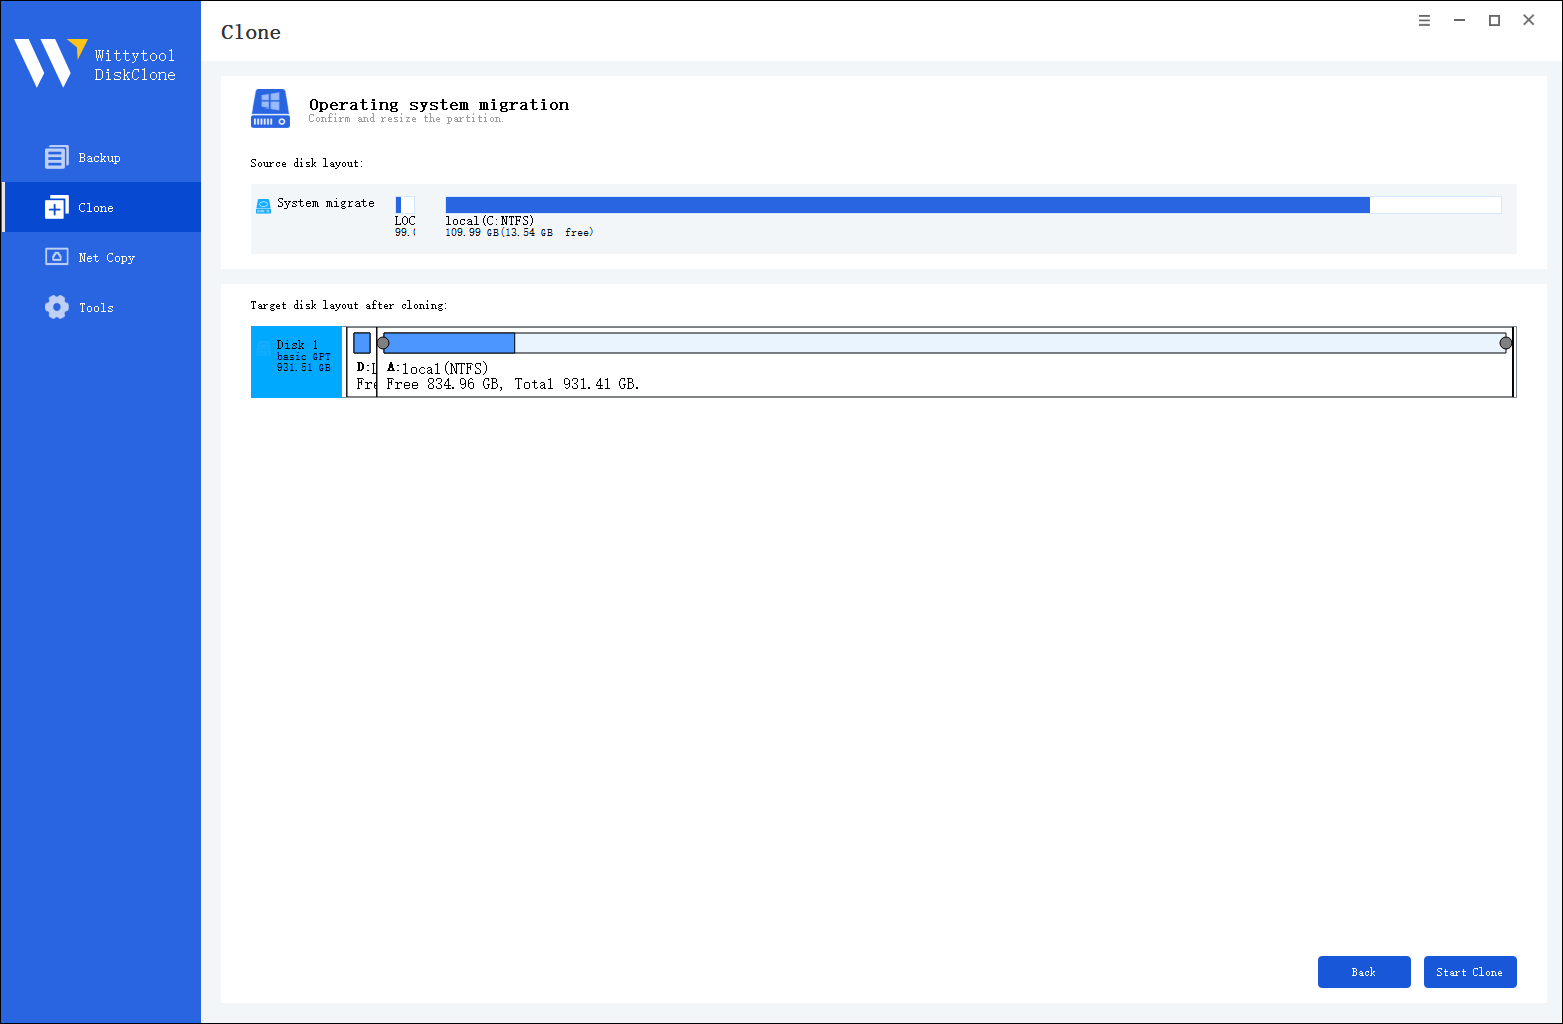
Step 3: Confirm Partition Size
Review and resize the partitions on the target disk as needed. Once ready, click the “Start Clone” button to begin the cloning process. After cloning is complete, set the target disk as the boot disk in the BIOS and boot the system from it.
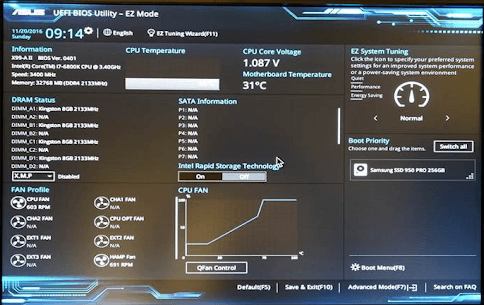
Post-Migration: Configuring Windows to Boot from Your New SSD
- Update BIOS/UEFI settings: Set the SSD as the primary boot device.
- Remove the old HDD temporarily: Prevents boot conflicts during initial setup.
- Repair boot records: Use
reagentc /enableorbootrec /rebuildbcdif the system fails to start.
Why Do I Need to Transfer OS to SSD?
- Speed boost: SSDs reduce boot times by 70% compared to HDDs.
- Space optimization: Migrate only the OS to free up HDD storage for files.
- Prevent system failure: Aging HDDs risk data loss; SSDs offer better reliability.
- Avoid reinstallation: Preserve installed apps and personalized settings.
Conclusion
Migrating your OS to an SSD in 2025 is simpler than ever with tools like Wittytool DiskClone. Whether you’re upgrading to an NVMe SSD or reusing an older SATA drive, this process ensures faster performance without reinstalling Windows. For advanced scenarios like installing Windows 7 on NVMe SSD or creating a recovery partition, refer to our dedicated guides.
FAQs About Migrate OS
1. How to Clone a Hard Drive to an SSD?
Use Wittytool’s “Disk Clone” mode for a full-sector copy. Ideal for users upgrading to larger SSDs.
2. Migrate OS VS Clone: Which Should You Choose?
- Migrate OS: Transfers only system files; ideal for NVMe upgrades.
- Clone: Copies all data, including hidden recovery partitions.
3. Migrate OS to SSD Failed?
- Ensure the SSD is initialized and formatted as NTFS.
- Disable Secure Boot if using legacy BIOS.
4. Why Your Cloned SSD Won’t Start
- Update motherboard firmware.
- Rebuild BCD records via WinRE.